
Setting up a gaming rig often comes down to one overlooked detail right at the back of the chassis. Plugging your display cable into the wrong display connector can slash your refresh rates or leave you running off integrated processor graphics instead of your high-performance graphics card. When considering which hdmi port is best for gaming, the primary priority is identifying whether you are connecting directly to your dedicated GPU rather than the motherboard video output. Choosing the correct port ensures you leverage full hardware acceleration, variable refresh rates, and the visual fidelity your dedicated card was built to deliver.
Display side connections matter just as much as what sits on the back of your desktop tower. Modern gaming monitors and televisions feature different revisions, ranging from standard 1080p connectors to ultra-fast 48Gbps interfaces capable of uncompressed high-refresh gaming. Exploring affordable gaming PC hardware highlights how balanced component choices prevent performance bottlenecks from the processor to the physical display connection. Understanding your hardware specifications helps you avoid signal degradation, dropped frames, and input latency across your entire gaming setup.





Comprehensive Guide to Selecting the Right HDMI Port for Gaming
Finding the optimal video output for your gaming setup requires evaluating both ends of your video cable. Many modern desktops and displays feature multiple connection points, but they do not all share identical bandwidth capabilities. Knowing which hdmi port is best for gaming comes down to picking a dedicated graphics output paired with a high-bandwidth display input. Making the proper connection ensures you unlock higher refresh rates, responsive input times, and vibrant color output without visual compromise.
Motherboard Video Out vs Dedicated Graphics Card Ports
The most critical distinction on any desktop gaming tower is the physical location of the HDMI port. Motherboard display outputs sit vertically near the top of the rear panel alongside standard USB ports. Further down, your dedicated graphics card provides horizontal expansion brackets with its own display outputs. Connecting your cable to the vertical motherboard port forces your system to run on integrated processor graphics. This routing mistake bypasses your discrete graphics card entirely, causing immediate frame rate drops in modern games.
Integrated graphics chips share system memory with the central processor, which strictly caps graphical bandwidth. A dedicated graphics card utilizes specialized high-speed video memory designed for complex 3D rendering and shader workloads. Running games through the motherboard output produces unstable frame pacing and forced graphical downscaling. Even modern integrated graphics cannot match the rendering throughput of an independent desktop graphics card. Plugging directly into the horizontal GPU port ensures the video signal originates from your primary rendering hardware.
Checking your physical setup takes only a moment and resolves a widespread performance pitfall. Look closely at the metal expansion brackets beneath your system fans. If your HDMI cable sits vertically next to the Ethernet port, power down and move it down to the horizontal graphics card connector. Prebuilt towers often include plastic dust plugs covering motherboard display ports to discourage accidental connections. Removing those covers is only necessary when diagnosing a machine that lacks a discrete graphics card.
HDMI Port Generations: Why HDMI 2.1 Outclasses HDMI 2.0
Understanding port generations clarifies why identical-looking sockets produce dramatically different performance. HDMI 2.0 provides 18Gbps of transmission bandwidth, which handles 1080p and 1440p gaming at standard refresh rates. However, HDMI 2.0 caps 4K video signals at 60Hz unless color subsampling is enabled. Color compression degrades text clarity and muddies fine HUD elements in fast-paced titles. For players who demand sharp visuals alongside high frame rates, older HDMI standards impose clear hardware limits.
HDMI 2.1 expands total pipeline bandwidth up to 48Gbps, more than doubling previous transmission limits. This substantial increase unlocks native 4K gaming at 120Hz or 144Hz with uncompressed 10-bit color. Modern graphics cards feature HDMI 2.1 outputs as standard equipment across current hardware generations. Utilizing this standard allows your gaming PC to drive advanced displays without sacrificing color fidelity or frame stability. The extra bandwidth also supports uncompressed multi-channel audio formats for immersive spatial sound.
Crucial gaming enhancements arrive directly integrated into the HDMI 2.1 specification. Variable Refresh Rate (VRR) synchronizes monitor refresh cycles to graphics card rendering output, eliminating screen tearing. Auto Low Latency Mode (ALLM) automatically disables lag-inducing post-processing filters on compatible displays. Fixed Rate Link (FRL) signaling technology replaces older transmission methods to maintain stable connections at high frequencies. When choosing an HDMI port for competitive PC gaming, an HDMI 2.1 interface delivers substantial technical advantages.
Identifying the Best HDMI Input on Your Gaming Monitor or TV
Display manufacturers frequently mix port generations on the back of monitors and televisions. A screen might offer several HDMI inputs, but only one or two may support full HDMI 2.1 specifications. Checking the silkscreen labeling beside each socket helps you identify the fastest connection. Ports marked with 4K 120Hz, HDMI 2.1, or PC indicate maximum throughput for your desktop tower. Connecting to an unmarked port or one labeled 4K 60Hz will limit your refresh rate regardless of your graphics card power.
Enhanced audio return channel (eARC) ports introduce another practical routing factor to consider. Televisions often place eARC on one of their high-speed inputs, which can create a conflict with soundbars. If an external soundbar occupies your primary 120Hz port, your high-bandwidth gaming options become limited. In those setups, connect your PC to the alternate 120Hz socket to avoid losing high-refresh visual capabilities. Checking your display manual clarifies which specific inputs support uncompressed 48Gbps throughput.
Physical connections must also align with internal display firmware settings. Many gaming monitors and televisions ship with conservative HDMI compatibility profiles enabled by default. You often need to open the display on-screen menu to activate options like HDMI Enhanced, Ultra Deep Color, or Game Mode. Leaving these features disabled can trap your Windows display settings at 60Hz or block HDR output entirely. Once enabled, your screen communicates its complete performance capabilities directly to your operating system.
Managing Multi-Device Setups with High-Bandwidth Switches
Sharing a single gaming display between a PC and consoles creates recurring connection challenges. Constantly swapping cables manually accelerates physical wear on both display inputs and graphics card ports. Utilizing a bi-directional manual switch provides an efficient solution without risking connector damage. Accessories such as the WinRaybot HDMI 2.1 Switch offer 48Gbps uncompressed transmission, supporting 8K at 60Hz and 4K at 120Hz between two sources. These switches toggle sources with a tactile button while preserving VRR and HDR metadata.
Another reliable device for managing dual sources is the GE 2-Device 8K HDMI Switch. Built with an aluminum chassis and external USB power, this switch maintains stable signal delivery across high-speed links. Providing full 48Gbps bandwidth prevents display flickering and black screens during demanding gameplay. Because these devices function as pure source selectors, they output to one screen at a time rather than splitting video. This architecture maintains proper handshaking protocols between your GPU and display, keeping your refresh settings stable.
Distinguishing an HDMI switch from an HDMI splitter is essential when configuring your desk. A splitter, like the LinSeek 4K HDMI Splitter 1 in 8 Out, mirrors one video feed across multiple displays. Splitters typically restrict signals to lower refresh rates like 30Hz or 60Hz to match the lowest-performing connected screen. They do not allow extended desktop layouts across multiple monitors or support variable refresh rate features. For high-performance gaming setups, a dedicated bi-directional switch remains the correct choice.
Signal Integrity: Cables, Extensions, and Port Protection
Selecting an optimal port is only effective if your video cable can handle high throughput. Running demanding video signals over older cables causes noticeable image sparkles, color distortion, and signal dropouts. To support uncompressed 4K gaming at high refresh rates, you should select an Ultra High Speed cable certified for 48Gbps. These cables feature internal shielding that resists electromagnetic interference generated by system power supplies and cooling fans. Keeping cable lengths reasonable preserves timing accuracy across the physical connection.
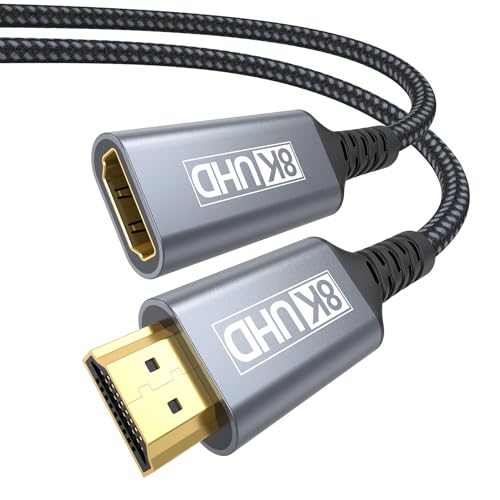
Cramped spaces behind wall-mounted monitors or compact PC cases often bend cables at severe angles. Using a durable extension, like the ApoJodly 8K HDMI Extension Cable 6FT, relieves mechanical strain on your graphics card socket. This extension incorporates 30AWG copper wiring, triple shielding, and gold-plated connectors rated for full 48Gbps transmission. Adding a flexible extension acts as a protective barrier when adjusting monitor arms or moving your desktop. It also prevents heavy cables from pulling downward against delicate graphics card solder points.
Signal strength naturally degrades as cable length increases, particularly under full 48Gbps workloads. Standard passive copper cables generally maintain reliable high-speed data transmission up to ten feet. If your gaming desktop sits farther away from your monitor or television, active optical HDMI cables become beneficial. Optical cables convert electrical pulses into light signals, allowing extended runs without latency penalties or bandwidth loss. Matching your cable quality to your port revision guarantees that your graphics card delivers its intended visual output.
Diagnosing and Repairing Damaged HDMI Display Ports
Physical ports on gaming machines endure substantial mechanical wear during regular use and desk adjustments. Accidental cable tugs or inserting plugs at harsh angles can crack internal pins or loosen the outer housing. Symptoms of port failure include intermittent black screens, distorted colors, missing audio channels, and complete signal drops. When internal socket pins bend, replacing cables cannot restore a stable connection. Inspecting the port with a focused light source quickly reveals cracked plastic guides, recessed pins, or broken solder anchors.
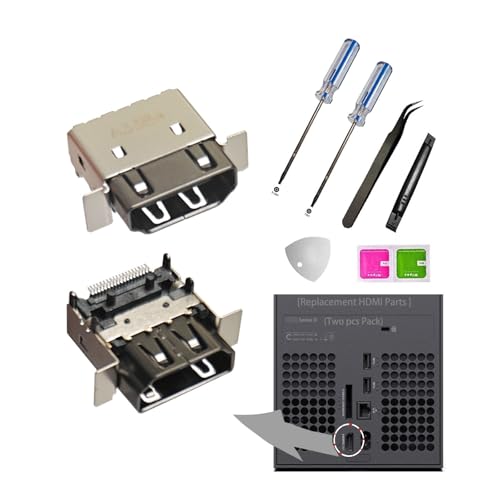
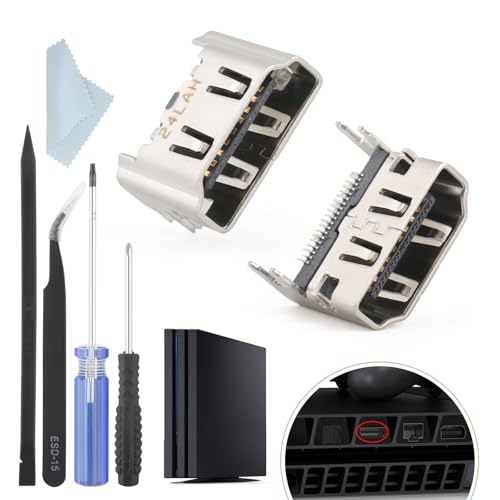
Replacing broken ports is a practical repair path for consoles and graphics hardware using OEM-style components. Parts like the HDMI Port Replacement for XSX Console Display from KUSTOMAZING or the (2pcs HDMI Port Pack) Series x HDMI Replacement from MBpartsactiva provide exact dimensional matches. Similar parts include the 4 Pack HDMI Port Replacement from Gorliskl and the 2-Pack HDMI Port Replacement for Xbox One S from Benseager. For older Sony consoles, the 2PCS for PS4 HDMI Port Replacement from YWLRONG and Molandra Products HDMI Port Socket Plug Jack provide factory-style replacement sockets. These components restore the physical interface necessary for reliable digital signal transfer.
Installing a replacement port requires specialized desoldering equipment and steady circuit board experience. Multi-layer gaming motherboards and graphics cards disperse heat quickly, making through-hole desoldering challenging for beginners. Solder wick, flux, and temperature-controlled rework stations are necessary to remove damaged sockets cleanly without lifting copper pads. If you lack micro-soldering experience, utilizing a qualified repair technician is a sensible precaution. Proper installation guarantees that all nineteen pins make firm electrical contact, restoring clean video output to your display.
HDMI versus DisplayPort for Desktop PC Gaming
Desktop graphics cards feature a standardized port configuration consisting of one HDMI port alongside multiple DisplayPort jacks. This layout reflects the longstanding preference for DisplayPort in desktop computer monitor manufacturing. DisplayPort 1.4 supports high refresh rates and variable refresh synchronization with minimal configuration hurdles. When planning a budget gaming PC build configuration, balancing your monitor inputs with your GPU outputs ensures optimal display sync. Understanding how these video interfaces differ helps you choose the right cable for your primary gaming display.
HDMI 2.1 matches the bandwidth of DisplayPort 1.4, but specific monitor features can still dictate port choice. Some gaming monitors only enable NVIDIA G-Sync Compatible variable refresh rates over their DisplayPort connections. Connecting those monitors over HDMI may leave adaptive sync toggles unavailable inside graphics control panels. However, televisions rarely feature DisplayPort jacks, making HDMI 2.1 the only high-speed option for living room setups. Checking your display specifications confirms whether your screen requires DisplayPort for full variable refresh support.
Multi-screen setups also benefit from thoughtful port allocation on your graphics card. Because most cards offer a single HDMI port, prioritize that connection for displays that explicitly require HDMI 2.1 bandwidth. Living room televisions or secondary displays lacking DisplayPort inputs should take that primary socket. Your primary desktop monitor can then connect via DisplayPort, leaving additional jacks available for supplementary panels or capture cards. Planning your display connections prevents unnecessary bandwidth restrictions across your entire gaming environment.
Practical Verification and Display Configuration Checklist
Plugging into the correct physical port is the first step toward getting optimal gaming performance. After booting Windows, check your display settings to ensure your operating system applies the intended refresh rate. Displays frequently default to a standard 60Hz refresh rate until manually updated in software. Open Advanced Display Settings, choose your primary display, and select the highest available refresh rate from the drop-down menu. Verifying this setting ensures you do not waste the high-frame-rate rendering power of your discrete graphics card.
Your graphics driver control panel provides additional settings for color accuracy and variable refresh rates. Within NVIDIA Control Panel or AMD Software, navigate to display resolution and color properties. Set your output color depth to 10-bit if your screen supports High Dynamic Range content. Select full RGB dynamic range rather than compressed formats to preserve sharp text and clean visual contrast. You should also confirm that G-Sync or FreeSync variable refresh technologies appear enabled and functional.
Completing these checks ensures your display connection operates at its full rated potential. Connecting to your graphics card rather than the motherboard eliminates frame throttling, while selecting an HDMI 2.1 input provides high-refresh fluidity. Using certified high-speed cables and enabling game-mode display profiles removes input latency and screen tearing. Taking time to inspect your physical connections and software settings establishes a dependable, responsive visual link for your entire gaming setup.





Write Your Review
No reviews yet. Be the first to share your experience!