
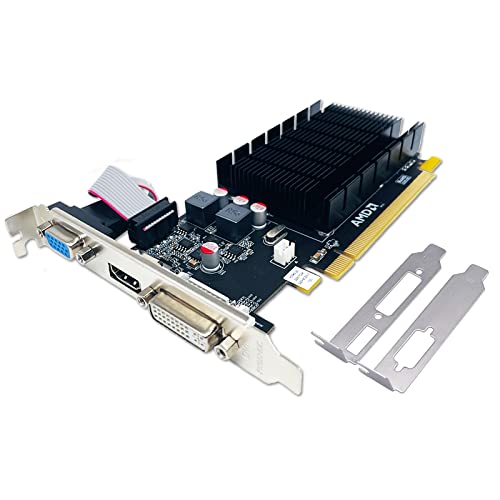
Sim racing transforms standard racing titles into deeply immersive driving experiences, but getting the hardware configured properly requires careful attention to both mechanical and digital details. If you want to know how to setup a gaming steering wheel, you must balance physical stability, cable routing, and proper operating system detection. A wheel that wobbles on a weak desk or disconnects during a turn quickly ruins the immersion. Linking your peripherals to a system powered by a capable dedicated gaming desktop graphics card ensures that high visual frame rates match the immediate response of your steering inputs.
Many players run into issues when force feedback settings fight against in-game physics or when pedals slide across slick flooring during hard braking. Taking the time to properly anchor your hardware and configure device drivers creates a predictable driving platform. You will find that modern racing wheels demand stable USB connectivity and accurate axis calibration to translate every countersteer accurately. Following a systematic process eliminates guesswork so you can spend your time dialing in lap times rather than troubleshooting unexpected hardware conflicts.

Step-by-Step Technical Guide for Gaming Steering Wheel Setup
Setting up a racing wheel on a PC involves coordinating physical hardware, electrical connections, and software layers. Whether you are aiming for casual track days or competitive sim leagues, each link in the chain influences how the car handles on screen. Skipping proper calibration or settling for an unstable mount often leads to inconsistent steering response and hand fatigue. By tackling the mechanical installation first and following through with exact software parameters, you can establish a reliable driving station that responds accurately to every steering input.
Selecting and Assembling a Dedicated Mounting Stand
Clamping a high-torque wheel directly to a standard office desk often causes annoying flex and wobbling. Dedicated wheel brackets resolve this issue by isolating the motor vibrations from your desktop monitor and peripherals. For example, stands like the Nejoney Racing Wheel Stand provide a rigid platform built from steel tubes that withstand sudden countersteering forces. This specific stand features an unfolding size of 25.6 inches in height, 23 inches in length, and 19.3 inches in width, while folding down to 34.3 inches high, 19.3 inches long, and 8.4 inches wide for compact storage.
Assembly begins by unfolding the frame on an even floor surface and securing the locking knobs firmly. The supplied anti-slip mat helps prevent the base from walking across hardwood or smooth tile during intense driving sessions. You can adjust the stand height anywhere from 25.6 inches up to 31.9 inches to align naturally with your seating height. Setting the wheel plate angle to match your natural forearm position minimizes shoulder strain during longer endurance races.
Securing the Wheel Base, Pedals, and Shifter
Physical rigidity at the contact points is vital for realistic force feedback reproduction. The wheel bracket includes pre-drilled mounting patterns compatible with popular hardware such as the Logitech G25, G27, G29, and G920, alongside Thrustmaster units like the T300, T300RS, T150, TX F458, and T500RS. Other wheel models can be clamped securely to the extra-wide top plate using their built-in table clamps. Tighten mounting bolts evenly in an alternating pattern so the wheel base sits flush against the metal plate without tilting.
Pedal placement requires equal attention because heavy threshold braking exerts significant forward pressure. Secure the pedal assembly to the lower frame plate using the manufacturer bolts or dedicated brackets to eliminate lift under hard stops. If your kit includes an external manual gear shifter, attach the included shifter bracket to either the left or right side depending on your preferred driving configuration. Checking that all bolts are snug before plugging in any electronics prevents annoying rattles once the vibration motors kick into action.
Cable Management and Connecting to Desktop USB Ports
A tidy wiring setup prevents snagged cables that can yank ports loose when turning the rim quickly. Route the pedal cable, shifter lead, and external power brick cable along the steel tubes using hook-and-loop straps or zip ties. Always leave a gentle loop of slack near the wheel base so the steering shaft can rotate freely without pulling on internal connectors. Keep power adapters placed on a ventilated surface away from foot pedals to avoid kicking them accidentally while driving.
Connect the wheel’s USB cable directly to a rear USB port on your desktop motherboard rather than a front-panel pass-through or unpowered hub. Rear ports provide stable bus power and minimal latency, which prevents sudden dropouts when the motor draws peak electrical loads. Sim racing systems with high-power motors benefit greatly from steady current, and pairing your computer setup with a reliable battery backup system can protect your hardware from power flickers mid-session. Avoid sharing the same USB controller channel with high-bandwidth devices like external capture cards or external hard drives.
Installing Essential Drivers and Manufacturer Software
Modern operating systems may recognize your racing wheel as a generic input device, but full functionality requires vendor-specific drivers. Navigate to the manufacturer support page for your specific peripheral brand, such as Logitech G HUB, Thrustmaster Control Panel, or Fanatec software suites. Download and install the latest official software package before launching any racing titles. These companion programs allow you to manage firmware updates, customize rotational range, and set individual axis profiles for different cars.
Firmware updates are occasionally pushed through these utility suites to improve motor response and patch known bugs. Keep the wheel connected and never unplug the USB or power cable while a firmware update is writing to the onboard memory. Once the update completes, the wheel will typically perform a self-calibration sequence by spinning rapidly from lock to lock before returning to dead center. Keep your hands clear of the spokes during this automatic self-test to prevent mechanical strain or personal injury.
Windows Controller Calibration and Diagnostics
Before launching a game, verify that the operating system reads all physical inputs correctly. You can access the native Windows Game Controllers utility by pressing the Windows Key and R together, typing joy.cpl into the prompt, and pressing Enter. Select your listed racing wheel from the dialog box and click Properties to open the real-time test window. This interface displays raw data bars for your throttle, brake, clutch, steering angle, and individual button presses.
Rotate the wheel fully in both directions to verify that the digital crosshair or gauge traces smoothly without jumping or stalling. Depress each pedal slowly to its mechanical stop and confirm that the axis travels smoothly from zero to one hundred percent. If the pedals register as active when released, toggle the combined pedals option off in your driver software so each pedal operates on an independent axis. Confirming these basic signals in Windows prevents confusing behavior once you load into complex racing titles.
In-Game Input Mapping and Axis Configuration
Every racing simulation handles controller profiles differently, meaning you must bind your axes inside each title’s settings menu. Launch your chosen game and navigate to the controls or input options menu. Many major titles offer pre-configured presets for popular wheel models, which serve as an excellent baseline for initial configuration. If a default profile is unavailable, choose a custom controller slot and manually bind steering left, steering right, throttle, brake, and gear shifters.
Pay close attention to axis direction when mapping foot pedals during the configuration phase. Some titles default to inverted pedal signals, causing your vehicle to apply full brakes when your foot is completely off the pedal. If this occurs, simply check the invert box next to the affected pedal axis in the game menu. Test each button assignment, including pit limiter, look left, look right, and headlights, to ensure you can execute vital commands without taking your hands off the steering wheel rim.
Calibrating Operating Angles and Rotation Limits
Matching your wheel’s physical steering lock to the on-screen virtual cockpit creates an intuitive connection between your hands and the car. Most modern road cars and GT3 race cars utilize between 540 degrees and 900 degrees of overall rotation from lock to lock. Formula cars often use a tighter rotation angle around 360 to 400 degrees to allow quick directional changes without crossing your arms. Set your manufacturer utility software to 900 or 1080 degrees, and let the simulator synchronize the exact steering ratio automatically per vehicle.
If you notice that your physical steering inputs do not match the virtual driver’s hands, look for a steering linearity setting inside the game. Setting steering linearity to one or zero percent ensures a linear one-to-one response across the entire turning range. Non-linear settings are typically intended for handheld gamepads and can create an unnatural sluggishness around center on a true steering wheel. Verify the visual alignment on a practice track before entering ranked online competition.
Tuning Force Feedback and Preventing Signal Clipping
Force feedback communicates tire grip, suspension load, curb strikes, and weight transfer directly into your palms. Achieving a realistic sensation requires balancing overall gain against the mechanical limits of your wheel base motor. Setting the force feedback gain too high causes signal clipping, where the simulator demands more torque than the motor can produce. When clipping occurs, the feedback feels like a flat, heavy resistance, masking subtle details like understeer or momentary loss of rear traction.
Start by setting in-game force feedback strength around sixty to seventy percent of the total output. Many simulators feature an on-screen telemetry bar that flashes red whenever the motor encounters clipping events. If you see the meter spiking into the red during heavy cornering loads, lower the overall gain by five percent increments until the signal remains within the green operating zone. Reducing artificial damping and center spring effects allows the authentic physics engine calculations to shine through without muddying the tactile feedback.
Balancing PC Hardware Performance for Input Consistency
Physics engines in advanced simulators update at hundreds of Hertz, placing unique demands on desktop processor performance and graphical throughput. When frame rates drop or stutter occurs, input latency increases, making it harder to catch a sudden slide or place your tires accurately on corner apexes. Players configuring a dedicated station can explore our guide to a budget-friendly custom gaming build to identify balanced component combinations that maintain fluid frame rates. Consistent frame times are far more critical for sim racing precision than simply chasing maximum visual settings.
Adjust graphics options such as shadow detail, crowd rendering, and post-processing filters to lock in a dependable frame rate that matches your display refresh rate. Running an unlocked, fluctuating frame rate can introduce subtle visual jitter that interferes with your judgment of braking markers. Enable low-latency modes within your graphics control panel to minimize render queue delays between your steering wheel inputs and on-screen rendering. A responsive computer system ensures that the force feedback details transmitted through your wheel stand feel immediate and authentic.
Troubleshooting Disconnections and Recognition Errors
Intermittent disconnects during a race are among the most frustrating issues a sim driver can encounter. This problem often stems from Windows USB power management settings cutting power to the peripheral during perceived idle states. Open the Windows Device Manager, expand the Universal Serial Bus controllers category, right-click your USB Root Hubs, and select Properties. Under the Power Management tab, uncheck the box that permits the computer to turn off the device to save power, ensuring steady power delivery at all times.
If your wheel fails to calibrate or spins continuously when powering on, inspect the optical encoder or power supply brick. A loose power cable can supply enough current to illuminate indicator lights while failing to deliver the higher voltage required by the steering motors. Disconnect the USB lead, unplug the wall adapter, wait thirty seconds for internal capacitors to discharge, and reconnect everything firmly. Testing the wheel on another USB port can also resolve driver conflicts caused by corrupted registry entries.
Ergonomics and Long-Term Rig Maintenance
Sustained driving comfort relies on aligning your seat, pedals, and steering wheel into a natural posture. Your arms should rest with a slight bend at the elbows when gripping the wheel at the nine and three o’clock positions, rather than locking your joints out straight. The pedal deck should be angled so your ankles do not hyperextend when applying full pressure to the brake. Adjusting the stand height and tilt angle allows you to maintain optimal leverage without straining your lower back during extended driving stints.
Mechanical hardware experiences continuous vibration from dual-motor or direct-drive force feedback systems. Periodically check all structural bolts, clamping knobs, and pedal mounting screws, retightening any hardware that has worked loose from road rumble effects. Wipe down the steel tubing and pedal faces with a dry microfiber cloth to clear away dust, pet hair, and floor grit that can infiltrate potentiometer sensors. Taking a few minutes for regular hardware upkeep guarantees your steering station remains solid, responsive, and ready whenever you decide to hit the track.





Write Your Review
No reviews yet. Be the first to share your experience!