


Dust accumulation inside a desktop chassis restricts airflow, drives up component temperatures, and can trigger thermal throttling during demanding gaming sessions. Learning how to clean gaming pc hardware correctly protects your investment by maintaining steady cooling performance and preventing hardware stress. Fine debris settles rapidly across intake mesh filters, radiator fins, and cooling fan blades, forcing fans to spin at higher speeds to move air. Maintaining clean airflow pathways helps preserve quiet operation and consistent clock speeds across your processor and graphics card.
Routine maintenance also extends to external surfaces and setup peripherals, though internal hardware requires special care and static-safe handling. Understanding the physical layout of your chassis helps you plan a safe maintenance routine before opening any side panels or unseating sensitive parts. Protecting your dedicated graphics card performance and system cooling fans requires the right tools rather than abrasive household cleaners. Setting aside thirty minutes every few months keeps internal components clear of lint and helps your entire gaming rig run smoothly.

Pros
- Streak-free and residue-free cleaning for gaming displays
- Safe on all screen types, including curved and matte finishes
- Includes a high-quality microfiber cloth that won't scratch surfaces
- Long-lasting 8oz bottle with controlled spray nozzle for mess-free application
- Anti-static properties help repel dust for extended cleanliness
Cons
- Not designed for heavy-duty stain removal like dried-on adhesive or grease
- Bottle may leak if stored horizontally; best kept upright
- Only one cloth included; additional cloths may be needed for larger setups
Clean Game Monitor Cleaner Spray and Microfiber Cloth is a dedicated cleaning kit built for PC gamers, competitive and casual gamers, esports players, streamers, content creators, and anyone with a high-end gaming setup. This 8oz spray and included microfiber cloth target the smudges, dust, and fingerprints that accumulate on gaming monitors, curved screens, laptops, tablets, and phones. According to user feedback, the formula leaves a streak-free finish that maintains visual clarity and reduces glare during intense gaming sessions or streaming on Twitch and YouTube.
The spray's advanced formula is alcohol-free and ammonia-free, making it a safe choice for all screen types including LCD, OLED, and LED gaming monitors. The included scratch-free microfiber cloth is ultra-soft and designed to lift dirt without leaving scratches or abrasions. For gamers who maintain multiple monitors or clean consoles like a PlayStation or Xbox, this kit provides a gentle yet effective clean that does not compromise the screen's protective coatings. The anti-static action mentioned in the product description suggests that dust buildup is minimized after each use, which can be a real convenience for those with open-air setups.
Using the kit is simple: spray the cleaner onto the microfiber cloth (never directly onto the screen) and wipe in gentle circles. The quick-drying formula leaves no residue, so your display is ready for gaming or work within seconds. The 8oz bottle delivers hundreds of sprays, offering long-term value for regular maintenance. For gamers who share a desk with a home office or dorm room setup, this versatile cleaner also works on laptop screens, tablets, and phone screens, reducing clutter from multiple cleaning products.
One realistic limitation is that this cleaner may not handle tough stains like dried adhesive or stubborn grease without some extra effort. Some users may also note that the bottle's nozzle can drip if not stored upright, though this is typical for spray cleaners. The kit includes one microfiber cloth, which is sufficient for a single monitor but may require washing between uses or purchasing additional cloths for multi-monitor rigs.
Overall, Clean Game's monitor cleaner is a practical, budget-friendly accessory for any gaming setup. Whether you're a competitive gamer who needs peak visual clarity, a streamer who wants a spotless backdrop, or a casual gamer looking to maintain equipment, this kit delivers reliable, streak-free results. Its safe formula and easy application make it a worthwhile addition to your desk organization and cable management routine.

Pros
- Safe for all gaming devices including sensitive screens and OLED displays.
- Individually wrapped wipes stay moist and convenient for travel or tournaments.
- Fast-drying leaves no sticky residue behind.
- Versatile – works on controllers, keyboards, mice, monitors, and more.
- Portable pack fits easily in a backpack for on-the-go cleaning.
Cons
- Price per wipe is higher than bulk generic wipes.
- 30-count pack may be used quickly for frequent cleaning.
- Not a deep cleaner for heavy buildup or sticky residues.
Audio-Wipes Gaming Cleaning Wipes are a specialized cleaning solution designed for gamers who want to keep their valuable gear in top condition. This product is a set of 30 individually wrapped wipes that are alcohol-free and fast-drying, making them safe for use on gaming controllers, keyboards, mice, monitors, and other electronics. Whether you're a PC gamer, a competitive esports player, a streamer, or a casual gamer, these wipes offer a convenient way to remove sweat, dust, and grime without risking damage to sensitive surfaces.
In real-world use, maintaining clean gaming equipment can directly impact performance. Sweat and oil buildup on controller grips can reduce comfort and responsiveness, while dust on mechanical keyboards can affect key travel and accuracy. These wipes are formulated to gently clean without alcohol, which means no risk of discoloration or cracking on ABS plastic keycaps or rubberized grips. The fast-drying, streak-free formula is especially useful for monitors and OLED screens, ensuring visual clarity remains sharp during intense gaming sessions. For streamers and content creators, a clean setup also looks more professional on camera.
Build quality and practicality are key strengths of this product. Each wipe is individually wrapped in a foil packet, preventing them from drying out over time. This also makes them highly portable – you can toss a few in your bag for LAN parties, esports tournaments, or even just daily use in a shared gaming space. The alcohol-free composition is a significant advantage over many household cleaners, as it won't damage delicate coatings on screens or leave residue that attracts more dust. The wipes are also biodegradable, though the packaging is not, so disposal is straightforward.
Setup and maintenance are as simple as it gets: no software, no assembly, just wipe and let air dry for a few seconds. This low-effort cleaning routine can easily be incorporated into a weekly maintenance schedule for any gaming setup. One limitation is that while these wipes handle light to moderate grime well, they may struggle with sticky residue from spilled drinks or heavy buildup around keyboard keys. For those situations, a dedicated cleaning tool or isopropyl alcohol (used carefully) might be needed. Additionally, the 30-count pack might not last long for users who clean multiple devices daily, though the portability compensates for the smaller quantity.
For a practical buying recommendation, Audio-Wipes Gaming Cleaning Wipes are best suited for gamers who value convenience and safety for their expensive gear. They are a great fit for college gamers in dorm rooms, remote workers with gaming peripherals, or streamers who want a clean, professional desk area. The slightly premium price is justified by the individual wrapping and alcohol-free formula, which reduces the risk of accidental damage. If you prioritize long-term care for your mechanical keyboards, high-DPI mice, or OLED monitors, this product offers a reliable, no-fuss solution that fits easily into any gaming lifestyle.

Pros
- Excellent value for budget-conscious streamers and gamers.
- Clear audio with effective noise cancellation for a quiet gaming environment.
- Easy plug-and-play setup with versatile platform compatibility.
- RGB lighting adds aesthetic appeal without being overly distracting.
- Real-time monitoring ensures you never miss a beat during live streams.
Cons
- Plastic construction may not feel as premium as metal alternatives.
- Unidirectional polar pattern requires careful positioning to avoid off-axis sound loss.
- No included pop filter or shock mount, so plosives may be an issue.
The MRSDY V5 is a compact USB condenser microphone designed for gamers, streamers, and content creators who need decent audio without a hefty price tag. With its dynamic RGB lighting, built-in noise cancellation, and real-time monitoring, this mic aims to deliver a complete audio solution for desktop setups.
Targeted at budget-conscious PC gamers, console streamers, and even work-from-home professionals, the V5 offers plug-and-play compatibility across Windows, Mac, PS4, and PS5. Setting it up takes seconds; just connect the included USB-A cable and you're ready to talk. The compact footprint (3.54-inch base) makes it easy to fit on cramped desks, and the adjustable stand provides decent flexibility for positioning.
In real-world use, the noise cancellation button does a respectable job reducing keyboard clatter and ambient room noise. The unidirectional polar pattern focuses on sound directly in front of the mic, which helps during intense gaming sessions or live streams. The zero-latency monitoring is a standout feature at this price point – you can hear yourself clearly through the headphone jack without any delay, which is crucial for maintaining natural conversation flow during streams or Discord calls.
Build quality is mixed: the base feels sturdy enough, but the plastic body and stand may not withstand heavy handling. The RGB lighting is customizable via a bottom switch (on/off), and the mute button (also at the bottom) is functional but requires a bit of a reach when the mic is in use. The gain and volume knobs are smooth and responsive, allowing quick adjustments without pop or distortion.
Limitations include the lack of a pop filter or shock mount included in the box – you'll want to add those if you're prone to plosive sounds or desk vibrations. Additionally, the plastic construction might not appeal to streamers seeking a more premium look. But for the price, the V5 delivers reliable audio performance that outshines built-in laptop mics and many budget headsets.
Overall, the MRSDY V5 is a great entry-level microphone for casual streamers, college gamers, and anyone wanting to improve their audio quality for online gaming or video calls. It won't replace a professional XLR setup, but for under $20, it's hard to beat the combo of RGB, real-time monitoring, and solid noise cancellation. If you're building a compact gaming setup on a tight budget, this mic deserves a spot on your desk.
The MRSDY V5 delivers clear, crisp audio with a frequency response of 20Hz-20kHz and a signal-to-noise ratio of 78 dB. The cardioid (unidirectional) pattern minimizes background noise, while the dedicated noise reduction button further cleans up the signal. The zero-latency monitoring via the 3.5mm headphone jack lets you hear your own voice in real time, a must for streamers who need to adjust their delivery on the fly. The gain and volume knobs are conveniently placed for quick adjustments during gaming or recording sessions. While the mic doesn't have advanced features like selectable polar patterns or high-resolution audio, it performs admirably within its price bracket.
Complete Step-by-Step Walkthrough for Cleaning a Desktop Gaming PC
Cleaning a gaming desktop requires a methodical approach that balances thorough dust removal with electrostatic safety. Dust blankets heat sinks and chokes cooling fans over time, turning high-airflow cases into hotboxes that restrict hardware boost clocks. Addressing thermal bottlenecks through regular cleaning ensures that your internal components operate within normal temperature margins during heavy rendering or gaming workloads. Following a step-by-step cleaning sequence minimizes risk and keeps your system performing at its intended efficiency.
Essential Cleaning Tools and Surface Safety Preparations
Proper preparation starts with gathering safe, non-conductive tools before touching any internal hardware. Canned compressed air or an electric electronic duster provides the primary force for dislodging packed dust from heatsink fins and fan cowlings. Soft-bristled anti-static brushes help loosen stubborn grime clinging to fan blades and case corners without scratching sensitive traces. You should also keep high-grade microfiber cloths and specialized electronic cleaning solutions on hand for external panels and surrounding equipment.
Generic household cleaning chemicals, paper towels, and standard upright vacuum cleaners should never be used near exposed computer components. Paper towels shed fibers and can generate static charges, while abrasive window cleaners often contain ammonia or alcohol that strips protective coatings from acrylic or display panels. Using specialized supplies like the Clean Game Monitor Cleaner Spray with its microfiber cloth prevents micro-scratches on delicate tempered glass or external monitors. Keeping your cleaning gear organized ensures that moisture never contacts unsealed circuit boards during the process.
Powering Down and Workspace Preparation
Safety begins by completely disconnecting the desktop from electrical mains to prevent short circuits or component damage. Shut down your operating system normally, flip the rocker switch on the power supply to the off position, and unplug the power cable from the wall. If your setup connects through dedicated battery backup power systems, disconnect the tower directly from the battery unit to avoid accidental live current. Disconnect all display cables, USB peripherals, network lines, and audio plugs so the tower can move freely.
Move the desktop to an open, well-ventilated workspace with solid flooring, such as a wooden table or hard floor. Working on thick carpeting increases the buildup of electrostatic discharge, which poses an invisible risk to microchips and memory modules. Press and hold the chassis power button for five to ten seconds after unplugging the system to discharge any residual power lingering in motherboard and power supply capacitors. This simple step ensures the entire motherboard circuitry sits completely inert before you remove any side panels.
Removing and Cleaning Case Dust Filters
Most modern gaming enclosures feature removable nylon or magnetic mesh filters along the front, top, and bottom intake vents. These filters catch the bulk of airborne pet hair, carpet fibers, and larger lint particles before they penetrate the internal chamber. Carefully detach magnetic filters from the top and front panels, sliding the bottom power supply intake filter out from beneath the rear of the chassis. Inspecting these mesh screens shows you how much restriction your intake fans have been fighting during normal gaming operation.
Light dust accumulation on mesh filters can be blown away quickly with short bursts of compressed air outside your home. If grease, cooking oils, or sticky dust have bonded to the nylon weave, wash the mesh frames under lukewarm tap water without harsh detergents. Shake off excess moisture thoroughly and let the mesh dry completely in a well-ventilated spot before reinstalling it. Placing damp filters back onto a steel chassis creates severe moisture hazards for electrical components and can promote internal rust.
Clearing Dust from Case Fans and Chassis Intakes
Case fans are the workhorses of chassis ventilation, pulling fresh ambient air across hot components and exhausting warm air out the rear. Dust tends to coat the leading edges of fan blades, altering their aerodynamic balance and increasing operational noise. When using compressed air or an electric blower on case fans, always hold the fan blades steady with a finger or wooden dowel. Allowing compressed air to spin cooling fans freely can over-spin sleeve or fluid-dynamic bearings, causing permanent mechanical damage or sending unintended back-voltage into motherboard fan headers.
Use short, controlled bursts of air directed from the inside of the case outward to blow trapped debris away from internal cavities. For stubborn film stuck to blade surfaces, moisten the corner of a microfiber cloth or an alcohol-free wipe and gently wipe each individual fin. Pre-moistened options such as Audio-Wipes Gaming Cleaning Wipes offer safe residue removal across plastic fan cowlings and non-electronic frame plastics without risking harsh chemical exposure. Wipe down the interior frame brackets where dust clumps often hide behind front intake radiator brackets.
Safely Cleaning CPU Air Coolers and Liquid Cooling Radiators
Central processing unit coolers bear the heavy burden of transferring thermal energy away from the silicon die, requiring clear metal fin stacks to work. Air coolers feature dense aluminum fins that trap lint between the metal layers, creating a thermal blanket that impairs heat dissipation. Aim your compressed air nozzle parallel to the cooling fins to blow the compacted lint out through the opposite side of the tower. If your cooler has detachable fans, unclip them temporarily to gain direct access to the metal surface underneath where dust carpets form.
All-in-one liquid cooling radiators require equal care because their fine aluminum fins bend easily under physical pressure. Never poke brushes or stiff tools deeply into radiator channels, as punctured coolant tubes cause catastrophic leaks across your core components. Blow compressed air through the radiator fins toward the exterior exhaust direction while holding pump tubes gently out of the way. If lint remains wedged deeply between the fins, a soft miniature nylon brush can lightly sweep across the surface without flattening the delicate metal structure.
Dust Removal for Graphics Cards and Motherboard Slots
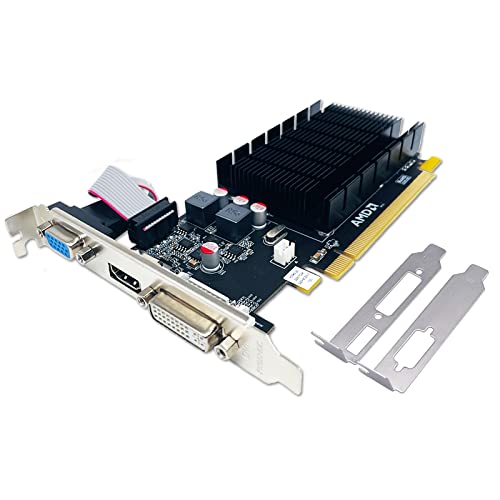
Graphics processing units generate substantial heat, pulling air upward through complex heatsinks encased beneath decorative plastic shrouds. Dust frequently accumulates inside the fan hubs, along the baseplate, and across exposed surface-mount resistors on the back of the circuit board. Hold each graphics card fan stationary while spraying short bursts of dry air between the heatsink fins and around the exhaust bracket. Keep the air canister upright to avoid spraying liquid propellant onto delicate printed circuit boards, which can cause severe thermal shock or moisture deposits.
Motherboards also collect dust along PCIe slots, memory latches, and power delivery heatsinks surrounding the CPU socket. Use a dry, static-safe brush to gently dislodge dust settled into the crevices of memory channels and expansion slots. Never use vacuum attachments directly on these bare electronics, as rapid air movement through plastic vacuum hoses creates significant static electricity. A light sweep followed by a gentle burst of filtered air leaves expansion slots clean and ready for uninterrupted electrical contact.
Power Supply Safety and Lower Shroud Maintenance
Power supply units sit at the base of most modern chassis configurations, drawing cooling air from underneath the case and expelling it out the rear. You must never open, puncture, or stick metal tools into the casing of a power supply under any circumstances. Internal high-voltage capacitors store lethal electrical charges for days or weeks even after the power cord has been disconnected from the wall. Strict power supply safety requires leaving the metal enclosure closed and cleaning only the outer exterior ventilation grilles.
Clean your power supply by blowing compressed air through the exhaust honeycomb mesh while the intake fan is held stationary from beneath the case. This expels loose lint out through the bottom intake path without opening the sealed power housing. Clean out the lower chassis basement shroud where excess modular cabling often traps loose dust bunnies and debris. Keeping this lower compartment clear prevents loose dust from being sucked into the power supply intake during long gaming sessions.
Cleaning Glass Panels, Outer Metal Surfaces, and Setup Gear
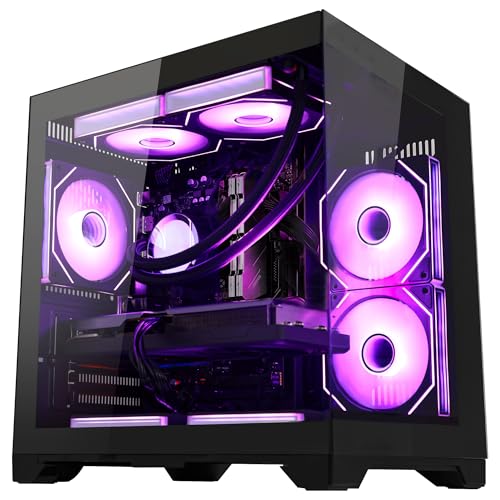
Tempered glass side panels enhance the visual appeal of modern rigs but attract fingerprints, interior dust film, and oily smudges over time. Place removed glass panels flat on a soft microfiber towel to prevent edge impacts, which can shatter tempered glass into tiny fragments. Spray a mild, residue-free solution like Clean Game Monitor Cleaner Spray onto a microfiber cloth rather than spraying the glass directly while it sits on the chassis. Wiping in smooth circular motions removes smudges without leaving streaks or dripping liquid onto internal power connections.
Outer metal chassis panels and plastic trim require similar care to keep dust from recirculating back into fresh air intakes. Wipe down painted steel surfaces with slightly damp microfiber cloths, avoiding abrasive scouring pads that leave permanent swirls in matte finishes. While cleaning your tower, remember that adjacent gear on your desk also gathers dirt that eventually migrates into your desktop intake fans. Taking a moment to clean your mousepad, desk surface, and adjacent audio gear such as a desktop condenser microphone maintains overall room hygiene and keeps surrounding airborne dust to a minimum.
Audio and streaming accessories sitting on your gaming desk also benefit from quick, safe surface cleaning to maintain functional reliability. High-touch equipment like external volume knobs, mute toggles, and microphone mesh grilles often collect oily residue and dust over extended gaming marathons. Using alcohol-free cleaning wipes helps sanitize outer microphone bodies and peripheral chassis plastic without harming delicate painted badges or sensitive audio capsules. Keeping your entire desk ecosystem clean ensures that less grime transfers onto your hands and back into your gaming PC enclosure.
Post-Cleaning Reassembly and Airflow Verification
Once all internal and external dust has been removed, carefully inspect the chassis interior for loose tools, stray bristles, or disconnected cables. Ensure all fan power headers, front panel connectors, and PCIe supplemental power cables remain firmly seated in their respective sockets. Reattach dried dust filters to their magnetic mountings or slide-in tracks, confirming that each filter sits flush against the chassis intake frame. Replace both side panels, tightening thumbscrews securely by hand to prevent panel vibration and rattling once fans begin spinning.
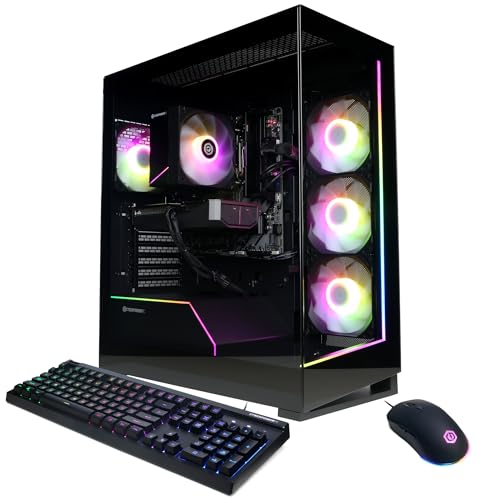
Reconnect your video cables, audio devices, and power cord, then power on the desktop to observe fan rotation through the glass panel. Verify that all chassis fans spin smoothly without rubbing against loose cables or making grinding bearing noises. Modern systems like entry level gaming desktop builds rely heavily on balanced static pressure, so checking that intake and exhaust fans spin properly is essential. Boot into your operating system and monitor hardware monitoring utilities to verify that idle and load temperatures remain stable under standard operating conditions.
Establishing a Routine Desktop Maintenance Schedule
Maintaining peak thermal efficiency requires establishing a realistic maintenance routine tailored to your gaming environment and room conditions. Rigs positioned on hard desks in pet-free rooms generally need internal dust blowouts only once every six to twelve months. Conversely, computers resting on the floor or operating in homes with pets require monthly filter inspections and quarterly internal blowouts. Setting a recurring maintenance reminder prevents severe lint accumulation from insulating sensitive components and choking critical cooling pathways.
Keeping your gaming space clean drastically reduces the amount of dust your high-airflow intake fans pull inside the case each day. Elevate your computer off deep-pile carpeting using a solid riser board or desktop mount to prevent bottom power supply intakes from acting as vacuum cleaners. Vacuuming the surrounding room regularly while the PC is turned off prevents airborne debris from settling near your chassis intakes. Combining thoughtful room placement with regular filter cleanings keeps your desktop operating quietly, coolly, and reliably across years of demanding gaming.
Mastering the practical steps of desktop PC maintenance ensures your cooling hardware delivers peak airflow when running demanding games. Following safe power disconnection procedures, holding fan blades during blowouts, and avoiding liquid exposure on printed circuit boards protects critical components from unnecessary thermal and electrical hazards. Keeping intake filters clear and maintaining clean desk surfaces prevents airborne debris from degrading cooling efficiency over time. Regular care preserves quiet fan profiles, maintains stable boost clocks, and ensures your system continues delivering dependable gaming performance season after season.





Write Your Review
No reviews yet. Be the first to share your experience!