


Setting up a desktop gaming rig involves far more than simply plugging a power cord into an electrical outlet and pressing the power button. Unpacking a modern system, whether you choose ready-to-use prebuilt gaming desktop options or assemble components yourself, demands careful attention to physical positioning, cooling ventilation, and proper cable routing. Beginners often face frustrating hiccups during the first hour of ownership, such as blank screens caused by incorrect video output connections or sluggish frame rates resulting from default operating system display settings. Learning how to setup gaming pc essentials ensures that every component functions as intended from the very first boot.
A smooth initial setup bridges the gap between raw hardware specifications and dependable in-game performance. Ensuring proper airflow around the chassis protects sensitive silicon from thermal throttling, while completing clean operating-system installations and driver updates prevents unpredictable game crashes. Taking systematic steps during unboxing, cable management, peripheral setup, and initial software configuration eliminates guesswork and creates an organized, reliable gaming environment. This practical walkthrough guides you through each phase of establishing your desktop station, allowing you to focus on playing your favorite titles with confidence.

Pros
- All-in-one bundle saves time and effort in building a complete gaming setup.
- Solid 1080p performance for esports and casual titles with the Ryzen 5 processor and Vega graphics.
- Ample storage and RAM for multitasking and storing games.
- RGB lighting adds visual appeal to any desk setup.
- Windows 11 pre-installed for modern compatibility.
Cons
- Integrated graphics may struggle with newer AAA titles at higher settings; dedicated GPU not included.
- Monitor and peripherals are likely entry-level; users wanting higher quality may need to upgrade.
- Limited upgrade path due to prebuilt nature; some components may be proprietary.
The Periphio Terra Gaming PC Bundle is exactly what it sounds like: an all-in-one battlestation designed for gamers who want a complete setup right out of the box. It pairs a compact gaming desktop with a 24-inch 1080p monitor, an RGB keyboard and mouse, an RGB gaming headset, stereo speakers, and even an XXL desk mat. For anyone from college gamers setting up a dorm room to streamers building their first dedicated gaming space, this bundle simplifies the entire process.
Under the hood, the PC runs on an AMD Ryzen 5 5600GT processor, which includes integrated Radeon Vega 7 graphics. That's a solid pairing for 1080p gaming in popular esports titles like Fortnite, Valorant, and League of Legends. With 16GB of DDR4 RAM and a 1TB NVMe SSD, the system handles multitasking with ease. You can have a game running, a Discord call in the background, and a browser with a few tabs open without noticeable slowdown. The NVMe storage means game load times are quick, and Windows 11 boots up in seconds.
The included peripherals cover the basics well. The RGB keyboard and mouse offer customizable lighting, and the gaming headset provides a built-in microphone for team communication. The stereo speakers add extra audio presence for casual listening, and the XXL desk mat protects your desk surface while giving your mouse plenty of room. The 24-inch monitor delivers 1080p resolution, which is the sweet spot for this system's graphics capability. While it's not a high-refresh-rate gaming monitor, it works fine for casual and competitive play at standard settings.
Build quality is what you'd expect from a prebuilt gaming PC bundle: the case is functional with tempered glass side panel and RGB fans, and the motherboard, power supply, and storage are reliable but not premium. The system comes with Wi-Fi connectivity, so you can place it anywhere in your home without worrying about Ethernet. Cable management inside the case is decent, though not as clean as a custom build. Setting up the entire bundle is straightforward: remove from packaging, connect the monitor and peripherals, plug in power, and you're ready to game.
A realistic limitation is the lack of a dedicated graphics card. The integrated Vega 7 graphics are capable, but they won't push high frame rates in demanding AAA titles like Cyberpunk 2077 or Red Dead Redemption 2 at high settings. If you're aiming for heavy PC gaming with ray tracing or 4K, this bundle isn't the right fit. Additionally, the included monitor and peripherals are entry-level; enthusiasts may eventually want to upgrade to a higher refresh rate display or mechanical keyboard with more features.
Overall, the Periphio Terra Gaming PC Bundle is a practical choice for gamers who want a turnkey 1080p gaming setup without the hassle of sourcing individual parts. It's particularly well-suited for casual gamers, esports fans, first-time PC buyers, and anyone building a gaming desk on a budget. The bundled accessories save money and time, and the RGB lighting gives the whole setup a cohesive, modern look. If you're okay with entry-level peripherals and integrated graphics, this bundle delivers exactly what it promises: a complete gaming battlestation that's ready to play.

Pros
- Strong gaming performance for the price with RTX 5060 and fast DDR5 memory
- Generous storage with 1TB PCIe 4.0 SSD for game library and media
- Easy setup out of the box with pre-installed Windows 11 and included keyboard/mouse
- Customizable RGB lighting adds visual flair to any gaming setup
- WiFi 6 and Bluetooth 5.3 support modern wireless standards for low-latency gaming
Cons
- Some users may prefer a higher-wattage power supply for future GPU upgrades (stock PSU could be limiting)
- Only 8GB VRAM on RTX 5060 may struggle with 4K gaming or heavy texture mods in demanding titles
- Stock CPU cooler might be adequate but aftermarket cooling could improve sustained performance and noise levels during long sessions
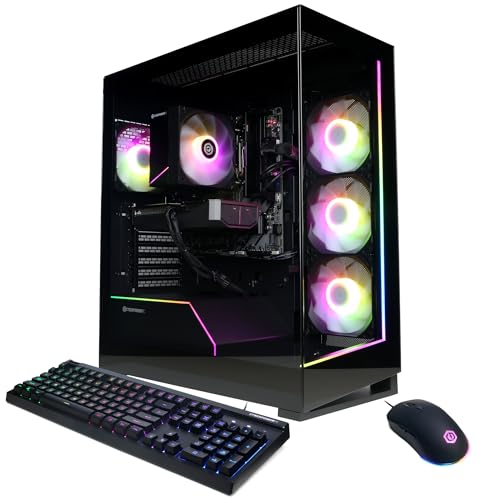
The CyberPowerPC Gamer Xtreme VR Gaming PC (model GXiVR8060A40) is a prebuilt tower designed for PC gamers who want solid out-of-the-box performance without the hassle of building their own system. Powered by an Intel Core i5-13400F processor and an NVIDIA GeForce RTX 5060 graphics card with 8GB of GDDR6 memory, this rig is built to handle competitive esports titles, popular battle royales, and even demanding single-player games at 1080p and 1440p resolutions with high settings. It also comes with 16GB of DDR5 RAM and a 1TB PCIe 4.0 NVMe SSD, ensuring fast load times and smooth multitasking for streaming, Discord calls, and content creation.
This gaming PC is best suited for competitive gamers, casual players, streamers, and gaming setup builders who value a reliable, ready-to-go system. The inclusion of WiFi 6 and Bluetooth 5.3 means you can connect wirelessly with minimal latency, which is great for online gaming and using wireless peripherals like gaming mice, headsets, or controllers. The custom RGB lighting inside the tempered glass side panel adds a vibrant touch that helps your setup stand out, making it appealing to RGB enthusiasts and those who want a cohesive desk aesthetic.
In real-world use, the CyberPowerPC Gamer Xtreme delivers responsive gameplay with low input lag, thanks to the combination of the fast 13th-gen i5, RTX 5060, and PCIe 4.0 storage. You can expect high frame rates in games like Fortnite, Valorant, Apex Legends, and Call of Duty Warzone, with plenty of headroom for streaming or recording gameplay using OBS or NVIDIA ShadowPlay. The 16GB of DDR5 RAM handles multitasking well, so you can have a browser, Discord, and Spotify open while gaming without noticeable slowdown. The included keyboard and mouse are functional for immediate setup, though most enthusiasts will likely upgrade to dedicated gaming peripherals for better ergonomics and performance.
Build quality is typical for a CyberPowerPC prebuilt: a cleanly assembled mid-tower case with a tempered glass side panel, painted metal interior, and decent cable management out of the box. The B760 motherboard offers good connectivity with one USB-C 3.2 port, two USB-A 3.2 ports, six USB-A 2.0 ports, and gigabit LAN. The stock cooling includes an air cooler for the CPU and case fans for airflow, which should handle the i5-13400F and RTX 5060 adequately for most users. However, under sustained heavy loads (e.g., extended rendering or marathon gaming sessions), you might notice the fans ramping up, and some users may prefer to swap the CPU cooler for a more efficient model or add extra intake fans for quieter operation. The case is compact but still offers room for basic future upgrades like adding more RAM or swapping the GPU.
Setting up the CyberPowerPC Gamer Xtreme is straightforward: connect power, monitor, keyboard, mouse, and internet, then boot into Windows 11 Home (already activated). The included keyboard and mouse are basic but allow immediate navigation. The system also supports RGB software (likely through the motherboard or a third-party utility) to customize lighting effects. Cable management is tidy, with the rear panel hiding most wiring, but the front I/O cables could be a bit tight if you decide to add internal expansion later. Cleaning the tempered glass panel requires a microfiber cloth to avoid smudges; the front mesh panel can be removed periodically to clean dust from the intake fans. Overall, maintenance is manageable.
One realistic limitation is the 8GB VRAM on the RTX 5060. While this is sufficient for 1080p and many 1440p titles, users aiming for 4K gaming or heavy texture packs in VRAM-intensive games may need to lower settings or consider a higher-tier GPU. Additionally, the power supply is likely a generic unit with enough wattage for current components but may not support a high-end upgrade like an RTX 5070 or higher without replacement. The lack of an optical drive is standard for modern prebuilts, and the system occupies a moderate desktop footprint. For college gamers or work-from-home gamers looking for a versatile PC that can also handle productivity tasks like video editing or streaming, this is a strong value. Based on the product specs and user feedback, this CyberPowerPC Gamer Xtreme is a practical, performance-focused choice for most PC gamers who want a reliable prebuilt with room to customize their RGB setup.
The Intel Core i5-13400F with 10 cores (6 performance + 4 efficiency) paired with the NVIDIA GeForce RTX 5060 8GB provides excellent 1080p and solid 1440p gaming performance. In competitive shooters like Valorant and Overwatch 2, you can expect well over 144 fps at high settings, making it a strong option for high-refresh-rate monitors. For AAA titles like Cyberpunk 2077 or Hogwarts Legacy, you can achieve 60+ fps at high settings with DLSS or FSR enabled. The 16GB of DDR5 RAM ensures smooth multitasking, and the NVMe SSD reduces load times dramatically.
The CyberPowerPC Gamer Xtreme features a steel chassis with a tempered glass side panel that showcases the internal RGB lighting. The motherboard is an Intel B760 chipset, and the overall build is clean with decent cable management inside. The case has a front mesh panel for airflow, and the included fans provide adequate cooling for the stock configuration. The power supply is a standard unit, and the case offers decent clearance for future upgrades like a larger GPU or aftermarket cooler. The overall build quality feels solid and reliable for a prebuilt at this price point.
Connectivity includes WiFi 6 and Bluetooth 5.3 for wireless peripherals and network access, plus a full suite of USB ports: one USB-C 3.2, two USB-A 3.2, six USB-A 2.0, and gigabit LAN. The rear I/O also offers 7.1 channel audio. The B760 motherboard has two M.2 slots (one occupied by the 1TB drive) and four SATA ports for additional storage. There are two DDR5 memory slots (one occupied by 16GB stick, leaving one free for expansion). The case supports standard ATX power supplies, most GPUs up to about 300mm length, and CPU coolers up to around 160mm height. This makes it reasonably upgradeable for future needs.


Pros
- Excellent value for budget-conscious streamers and gamers.
- Clear audio with effective noise cancellation for a quiet gaming environment.
- Easy plug-and-play setup with versatile platform compatibility.
- RGB lighting adds aesthetic appeal without being overly distracting.
- Real-time monitoring ensures you never miss a beat during live streams.
Cons
- Plastic construction may not feel as premium as metal alternatives.
- Unidirectional polar pattern requires careful positioning to avoid off-axis sound loss.
- No included pop filter or shock mount, so plosives may be an issue.
The MRSDY V5 is a compact USB condenser microphone designed for gamers, streamers, and content creators who need decent audio without a hefty price tag. With its dynamic RGB lighting, built-in noise cancellation, and real-time monitoring, this mic aims to deliver a complete audio solution for desktop setups.
Targeted at budget-conscious PC gamers, console streamers, and even work-from-home professionals, the V5 offers plug-and-play compatibility across Windows, Mac, PS4, and PS5. Setting it up takes seconds; just connect the included USB-A cable and you're ready to talk. The compact footprint (3.54-inch base) makes it easy to fit on cramped desks, and the adjustable stand provides decent flexibility for positioning.
In real-world use, the noise cancellation button does a respectable job reducing keyboard clatter and ambient room noise. The unidirectional polar pattern focuses on sound directly in front of the mic, which helps during intense gaming sessions or live streams. The zero-latency monitoring is a standout feature at this price point – you can hear yourself clearly through the headphone jack without any delay, which is crucial for maintaining natural conversation flow during streams or Discord calls.
Build quality is mixed: the base feels sturdy enough, but the plastic body and stand may not withstand heavy handling. The RGB lighting is customizable via a bottom switch (on/off), and the mute button (also at the bottom) is functional but requires a bit of a reach when the mic is in use. The gain and volume knobs are smooth and responsive, allowing quick adjustments without pop or distortion.
Limitations include the lack of a pop filter or shock mount included in the box – you'll want to add those if you're prone to plosive sounds or desk vibrations. Additionally, the plastic construction might not appeal to streamers seeking a more premium look. But for the price, the V5 delivers reliable audio performance that outshines built-in laptop mics and many budget headsets.
Overall, the MRSDY V5 is a great entry-level microphone for casual streamers, college gamers, and anyone wanting to improve their audio quality for online gaming or video calls. It won't replace a professional XLR setup, but for under $20, it's hard to beat the combo of RGB, real-time monitoring, and solid noise cancellation. If you're building a compact gaming setup on a tight budget, this mic deserves a spot on your desk.
The MRSDY V5 delivers clear, crisp audio with a frequency response of 20Hz-20kHz and a signal-to-noise ratio of 78 dB. The cardioid (unidirectional) pattern minimizes background noise, while the dedicated noise reduction button further cleans up the signal. The zero-latency monitoring via the 3.5mm headphone jack lets you hear your own voice in real time, a must for streamers who need to adjust their delivery on the fly. The gain and volume knobs are conveniently placed for quick adjustments during gaming or recording sessions. While the mic doesn't have advanced features like selectable polar patterns or high-resolution audio, it performs admirably within its price bracket.
Pros
- Straightforward, easy-to-follow language perfect for absolute beginners
- Covers the entire build process from planning to first boot
- Helps demystify PC components and compatibility for gaming setups
- Encourages hands-on learning without overwhelming technical jargon
- Compact size allows you to keep it near your build station without taking much space
Cons
- Not intended for experienced builders looking for advanced overclocking or modding tips
- Only available in paperback format, no digital version for quick searches
- Some topics may feel too basic for those already familiar with PC hardware
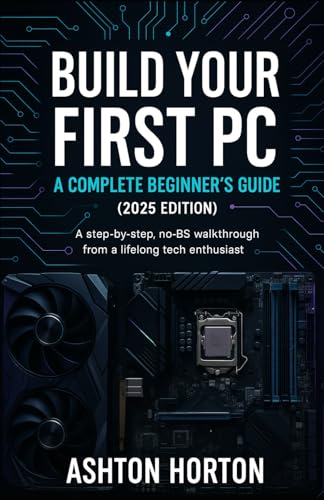
If you are a PC gamer, streamer, or content creator who has always wanted to build your own gaming rig but felt intimidated by the process, Build Your First PC: A Complete Beginner's Guide (2025 Edition) is exactly the resource you need. This no-BS walkthrough, written by a lifelong tech enthusiast, strips away all the confusing jargon and gets straight to what matters: building a reliable, performant gaming PC from scratch.
This guide is best suited for first-timers: college gamers setting up their dorm room battlestation, work-from-home gamers looking to assemble a dual-purpose desktop, or gaming PC buyers who want to understand exactly what goes into a custom build before making component purchases. The book covers everything from selecting compatible parts (CPU, GPU, motherboard, RAM, storage, PSU, case, and cooling) to physically assembling them and installing an operating system. The step-by-step approach is clear and methodical, so you never feel lost.
In terms of real-world usefulness, this guide directly addresses the common pitfalls that trip up new builders. It explains how to handle delicate components, manage cables for airflow and aesthetics, and ensure your system boots without issues. While it does not cover overclocking or extreme custom loops, it more than delivers on helping you get a stable, high-performance gaming PC ready for esports, casual gaming, or streaming on Twitch or YouTube. The peace of mind from following a proven process is invaluable.
Build quality of the book itself is solid: a compact paperback with dimensions of 5.5 x 0.16 x 8.5 inches, making it easy to prop up or stash near your workbench. The binding is durable enough to withstand multiple uses, and the print is clear. The content is well-organized, with logical chapters that build on each other. No software or digital extras are included, but the text is rich with practical advice that does not rely on flashy gimmicks.
One realistic limitation is that this book is strictly a beginner's guide. If you already know the difference between an ATX and ITX motherboard or have assembled a PC before, this may feel too basic. It does not cover advanced topics like custom water cooling, RGB lighting synchronization, or software tuning. However, for its target audience, it hits the mark perfectly. Maintenance and troubleshooting are covered at a high level, but the focus remains on successful first-time builds.
Overall, Build Your First PC is a practical, trustworthy companion for anyone taking their first steps into PC building. It removes the guesswork and builds confidence, making it a smart addition to a gaming setup builder's toolkit. If you are a competitive gamer, casual player, or streamer who wants to learn the ropes without spending hours on YouTube tutorials, this guide is a solid buy that will save you time, frustration, and potentially costly mistakes.

Pros
- Clear, easy-to-follow instructions suitable for all skill levels.
- Covers a wide range of topics from component selection to final assembly.
- Focuses on practical performance and reliability for gaming and streaming.
- Portable paperback format is convenient to reference during your build.
Cons
- As a book, it lacks hands-on interactivity or video demonstrations.
- Some advanced builders may find the content too basic for their needs.
- Limited to general advice; specific hardware recommendations may become outdated.
Build the Ultimate Gaming PC: A Step-by-Step Guide for Gamers is a practical paperback resource designed to help PC gamers, streamers, and gaming setup builders create their ideal rig. Whether you're a first-time builder or someone looking to refine your approach, this guide breaks down the entire process from selecting components to assembling and optimizing your system. It's a solid companion for anyone serious about building a high-performance gaming PC tailored to their needs.
This guide is best suited for PC gamers who want to take control of their gaming experience, competitive gamers aiming for low-latency performance, and streamers or content creators who need a reliable, powerful workstation. It also appeals to gaming setup builders and RGB enthusiasts who care about aesthetics and cable management. The step-by-step format makes it accessible for college gamers and work-from-home users alike, offering practical advice that applies to a wide range of builds.
In terms of real-world performance, the guide emphasizes component selection that directly impacts gaming responsiveness, input accuracy, and overall system reliability. It covers topics like choosing the right CPU, GPU, and memory for smooth gameplay, as well as cooling solutions to maintain airflow and prevent thermal throttling during long sessions. For streamers, there's guidance on building a rig that handles encoding and multitasking without lag, while casual gamers will appreciate tips for balancing performance with budget.
Build quality and practicality are central themes throughout the book. It discusses the importance of durable frames, mesh airflow designs, and tempered glass panels for aesthetics and cooling. The guide also touches on cable management techniques to keep your desk setup clean and organized, which is a big plus for anyone who values a tidy gaming space. While it doesn't cover specific accessories like mechanical switches or high-DPI sensors in depth, it provides a solid foundation for understanding how these components fit into a complete build.
Ease of setup is a key strength of this guide. It walks you through each step logically, from preparing your workspace to installing the operating system and drivers. The paperback format is easy to reference while working, though some users might prefer a digital version for quick searches. Maintenance tips are included to help you keep your system running smoothly, such as cleaning dust filters and updating software. One realistic limitation is that the book's advice is general, so you may need to supplement it with online resources for specific hardware compatibility or troubleshooting.
Overall, Build the Ultimate Gaming PC is a worthwhile investment for anyone planning a new gaming PC build or upgrade. It offers clear, actionable advice that can save you time and money while helping you achieve a setup that performs well for gaming, streaming, or content creation. While it won't replace hands-on experience or community forums, it's a reliable starting point that covers the essentials. For U.S. gamers looking to build their dream rig with confidence, this guide is a practical addition to your toolkit.
Pros
- Affordable price point for a complete gaming PC with modern CPU and fast SSD.
- Upgradable platform with AMD AM4 socket and DDR4 memory for future improvements.
- Includes keyboard and mouse, plus lifetime tech support from CyberPowerPC.
- Compact tower design fits well on most desks without taking up too much space.
Cons
- Only 8GB of RAM may limit multitasking in demanding games and streaming scenarios.
- Radeon RX 6500 XT lacks hardware encoding, which can impact streaming quality.
- Limited to 4GB VRAM may struggle with newer AAA titles at higher settings.
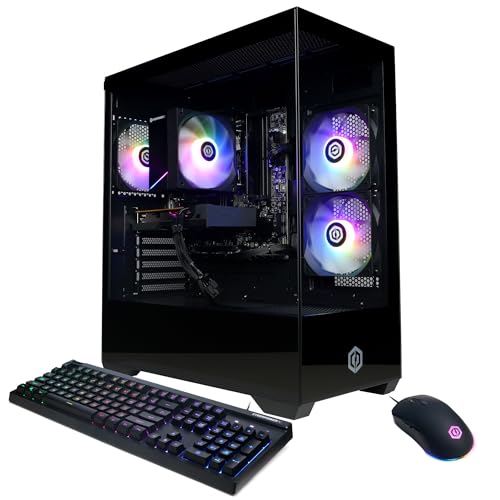
The CyberPowerPC Gamer Master GMA3100A3 is a pre-built gaming desktop aimed at gamers who want a ready-to-play system without the hassle of building their own. Powered by the AMD Ryzen 5 5500 processor and Radeon RX 6500 XT graphics, this rig is designed for smooth 1080p gaming in popular titles like Fortnite, Valorant, League of Legends, and CS2. It's a smart choice for casual gamers, college students dorm-room warriors, and anyone stepping into PC gaming for the first time.
In real-world use, the Ryzen 5 5500 handles everyday tasks and gaming with ease, offering responsive performance for both work and play. The 500GB PCIe 4.0 NVMe SSD ensures games and Windows load quickly, cutting down on waiting times. However, the 8GB of DDR4 RAM is a limiting factor — you may want to upgrade to 16GB soon if you plan to keep multiple browser tabs, Discord, and a game open at once. The RX 6500 XT is capable at 1080p medium settings in most esports titles, but its 4GB VRAM can be a bottleneck in newer AAA releases or when trying to push higher textures.
The system comes in a compact black tower with a tempered glass side panel and customizable RGB lighting. This makes it easy to show off your build, and the included keyboard and mouse help you get started right out of the box. Connectivity is solid with four USB-A 3.2 ports, four USB-A 2.0 ports, HDMI and DisplayPort outputs, WiFi 5, and Bluetooth 5.0. The lack of USB-C on the front panel is a minor inconvenience, but most peripherals will work fine with the available ports.
One realistic drawback is the RX 6500 XT's lack of hardware encoding, which means streaming via OBS or Discord may suffer in quality compared to Nvidia or higher-tier AMD cards. If streaming is a priority, you might want to consider a system with a better GPU. Also, the 8GB RAM is entry-level by today's standards — upgrading to 16GB is highly recommended for smoother multitasking and better performance in memory-intensive games.
Build quality is typical for a budget prebuilt: the case is sturdy enough, cable management is decent, and the cooling solution keeps temperatures in check during long gaming sessions. The 500W power supply is adequate for this configuration, but leaves limited headroom for major GPU upgrades later. If you're comfortable with basic upgrades, adding another 8GB stick of DDR4 is a simple and cost-effective improvement.
Overall, the CyberPowerPC Gamer Master GMA3100A3 is a solid entry-level gaming PC for those who want to jump into PC gaming without building from scratch. It's especially well-suited for esports players, casual gamers, and students on a budget. For more demanding AAA gaming or streaming, you may want to look at higher-tier configurations. But as a first gaming PC or a secondary system for a dorm room, it offers good value and room to grow.


Step-by-Step Desktop Gaming PC Setup and Configuration
Executing a clean, orderly desktop installation establishes the foundation for hardware longevity and consistent frame rates. Taking an intentional, step-by-step approach prevents common assembly oversights, software driver conflicts, and physical thermal issues before you launch your first gaming session. Following a verified sequence guarantees your hardware delivers its full intended capability whether you recently purchased a pre-assembled rig or assembled your own tower from individual components.
Workspace Preparation and Internal Inspection
Selecting the right physical location for your gaming desktop represents the first critical decision in your setup routine. A desktop tower requires adequate clearance around its intake and exhaust vents to maintain healthy internal temperatures during prolonged gaming sessions. Placing a computer directly on thick carpeting can obstruct bottom power-supply fan intakes and attract excess dust, making a hard, flat desk surface or dedicated floor riser far more suitable. You should ensure at least four to six inches of clear space behind the rear exhaust fan and above the top ventilation grills to promote continuous airflow.
Prebuilt computer systems often arrive with internal expanding foam packaging designed to protect heavy components like the graphics card and processor cooler during shipping. You must completely remove the side panel and carefully extract this protective padding before connecting any power cables to the machine. While the case remains open, gently inspect all visible internal hardware connections to ensure nothing loosened during transit. Checking that the memory modules, graphics card retention clips, and power supply cables are firmly seated prevents confusing power-on failures later.
Cable Connections and Display Port Selection
The most frequent physical error made by new PC owners involves plugging the monitor cable into the wrong video port on the rear of the computer case. Modern motherboards feature integrated video outputs near the top rear USB cluster, but these ports connect only to integrated processor graphics rather than your dedicated card. If your system features a dedicated graphics card, your monitor cable must connect directly into the horizontal ports located farther down the back panel. Plugging into the motherboard instead of the graphics card bypasses your primary graphics processor entirely, resulting in poor gaming frame rates or no display signal at all.
Connecting your display with a DisplayPort cable is generally preferred over standard HDMI when pairing your system with a high-refresh-rate gaming monitor. DisplayPort connections typically provide broader bandwidth compatibility for variable refresh rate technologies across diverse monitor panels. After securing the video connection, connect your essential input peripherals directly into the rear USB ports on the motherboard to ensure lower latency and minimal connection drops. Finally, plug your power supply cable directly into a grounded wall outlet or certified surge protector, and toggle the rear power rocker switch to the on position.
Initial Boot and BIOS Firmware Configuration
Powering on your system for the first time should immediately lead you into the motherboard firmware interface, commonly known as the BIOS or UEFI. As the computer powers up, tapping the Delete or F2 key repeatedly on your keyboard interrupts the standard boot sequence and opens the motherboard firmware menu. This preliminary screen provides vital information regarding your physical hardware components. You can instantly confirm whether the motherboard recognizes your installed processor, the total capacity of system memory, and your primary solid-state drive.
Enabling the correct high-speed memory profile in the firmware constitutes one of the most critical steps in the entire setup process. High-speed DDR4 and DDR5 memory modules default to basic standard speeds unless you explicitly activate Intel XMP or AMD EXPO within the BIOS settings. Without enabling this profile, your memory operates significantly below its rated frequency, which can measurably constrain modern processor gaming performance. Locate the memory profile section in your motherboard menu, select the advertised profile, verify the boot priority order for your primary drive, and save your settings before exiting.
Operating System Installation and Windows Setup
Installing modern Windows 11 requires a clean storage partition and an active internet connection to finalize account configuration. If your machine arrived with Windows pre-installed, powering on leads you directly into the initial Out-of-Box Experience configuration screens. During this initial setup process, selecting appropriate language, region, and keyboard layout options establishes your baseline system preferences. When prompted, connect your desktop to a stable wired Ethernet connection or your local wireless network to facilitate immediate online activation and account verification.
Reviewing optional privacy toggles during the Windows installation sequence helps eliminate unnecessary telemetry data collection from the start. You can decline optional diagnostic data sharing, personalized advertising experiences, and automated location tracking to keep your background environment lean. Immediately after reaching the primary desktop, open the Windows Update menu in system settings to download and install all pending security patches and platform updates. Completing these foundational operating system updates prevents driver conflicts before you proceed with dedicated hardware software installations.
Installing Dedicated Graphics and Chipset Drivers
Relying on generic display drivers provided through automated Windows updates will restrict your graphics card from utilizing its full capabilities. Dedicated graphics processors require official driver packages distributed directly by NVIDIA, AMD, or Intel to enable hardware acceleration, modern API support, and custom control panels. Navigating to the official GPU manufacturer website allows you to locate the exact driver package corresponding to your specific graphics card model and operating system. Installing these dedicated drivers unlocks proper resolution scaling, advanced visual presets, and specialized software enhancements like performance overlays.
Motherboard chipset drivers are equally important for regulating power states, PCIe lane bandwidth, and processor core scheduling. Downloading the official chipset driver package from your motherboard manufacturer or processor vendor ensures optimal communication between your CPU and connected storage drives. For users running specialized hardware or researching high-performance gaming computer configurations, updated chipset software ensures that high core-count processors allocate gaming workloads to the correct processing threads. Reboot your desktop after completing both driver installations so the operating system can load all new kernel-level services cleanly.
Display Refresh Rate and Resolution Settings
A remarkably common oversight among PC players involves running a high-refresh-rate monitor at the default sixty-hertz refresh rate for months without realizing it. Windows frequently defaults high-speed displays to sixty hertz upon initial connection to preserve universal compatibility. To correct this, right-click on your desktop, select Display Settings, navigate to Advanced Display, and inspect the available refresh rate drop-down menu. Selecting the highest available frequency, whether it is one hundred forty-four, one hundred sixty-five, or two hundred forty hertz, immediately produces noticeably smoother cursor movement and fluid in-game motion.
Verifying your native monitor resolution within the same display menu ensures text rendering remains sharp and games scale accurately. Running a panel below its native pixel resolution causes blurriness, uneven pixel scaling, and poor visual clarity across your operating system. In addition, enabling variable refresh rate technologies like G-Sync or FreeSync inside your graphics control panel synchronizes the monitor refresh cycle directly with your GPU frame output. This synchronization virtually eliminates screen tearing without introducing the noticeable input latency historically associated with traditional software vertical sync.
Audio Configuration and Peripheral Tuning
Configuring your audio playback and microphone devices in the Windows Sound control panel prevents confusing team communication issues during multiplayer matches. Modern motherboards feature multiple audio jacks, while USB headsets and standalone desk microphones introduce additional virtual audio channels into the operating system. Open the sound settings menu, identify your primary listening device, and set it as both the Default Device and Default Communication Device. Taking this step ensures that games and voice chat software like Discord automatically route audio to your headphones rather than monitor speakers.
Installing official peripheral configuration software allows you to customize mouse sensitivity, keyboard macros, and hardware polling rates. Setting your gaming mouse to an appropriate dots-per-inch level and configuring an elevated polling rate provides crisp, predictable cursor tracking. While configuring peripheral software, ensure you disable unnecessary startup services and animated background overlays to conserve system memory. Keeping peripheral software lean prevents background resource consumption that could otherwise detract from gaming performance on entry-level graphics card builds.
Storage Allocation and Background Software Hygiene
Managing your storage drives systematically prevents your primary operating system partition from becoming bloated and sluggish over time. Modern gaming desktops frequently feature an ultra-fast primary solid-state drive for Windows and core applications, paired with a larger secondary drive for game libraries. When installing platforms like Steam, Epic Games Launcher, or the Xbox application, deliberately specify which storage drive should house your downloaded game directories. Allocating game installations to dedicated folders keeps your system drive clean and ensures adequate free space for essential operating system cache files.
Maintaining at least fifteen to twenty percent unallocated free space on your solid-state drives is crucial for maintaining write performance and drive longevity. Solid-state drives rely on background wear-leveling algorithms and garbage collection routines that require empty blocks to operate efficiently. Establishing sensible startup application preferences also prevents your desktop boot times from slowing down as your library expands. You can open the Windows Task Manager, navigate to the Startup Apps tab, and disable auto-start permissions for any launcher or background utility not strictly required at boot.
Thermal Verification and Baseline Stability Testing
Conducting a preliminary thermal and stability verification confirms that your internal cooling solution operates correctly under practical operating loads. Downloading a lightweight, trusted hardware monitoring utility enables you to observe component sensor readings, including processor package temperatures, graphics card hotspot values, and fan speeds. At idle, modern desktop processors typically register modest temperatures depending on room ambient conditions, while graphics cards often enter silent zero-RPM fan modes. If your idle temperatures appear abnormally elevated right away, inspect internal case fans to verify that intake and exhaust fans are spinning freely.
Launching a demanding 3D game for twenty to thirty minutes serves as an excellent practical stability check for your newly established setup. While playing, observe whether cooling fans ramp up smoothly to dissipate heat and listen for any abnormal rattling or grinding noises inside the chassis. Verifying that the internal hardware operates within normal thermal thresholds under load confirms that thermal paste application, heatsink mounting pressure, and overall case ventilation are functioning properly. Stable gaming performance without unexpected shutdowns or thermal throttling confirms your rig is fully prepared for extended play sessions.
Completing these foundational hardware checks, operating system adjustments, and driver installations transforms an intimidating box of computer parts into a high-performance gaming workstation. Taking the time to configure memory profiles, establish correct monitor refresh rates, and organize storage directories protects your hardware investment and maximizes every frame of gaming potential. With all cables secured, drivers updated, and settings verified, your gaming PC is thoroughly prepared to deliver dependable, immersive experiences across all your favorite virtual worlds.




Write Your Review
No reviews yet. Be the first to share your experience!