


Planning your first custom desktop often feels daunting when faced with delicate processor pins, confusing power cables, and endless component options. Learning how to build a computer step by step allows you to bypass inflated retail margins while selecting the exact graphics card, memory, and cooling configuration your favorite games demand. While many gamers evaluate prebuilt gaming desktop options to avoid manual assembly, putting the hardware together yourself gives you total control over future upgrades and system tuning. Understanding how each component communicates ensures you build a balanced, stable machine capable of handling modern visual settings and competitive frame rates.
Proper preparation eliminates the anxiety of bent pins, electrostatic discharge, or failed boot cycles during your initial build. Gathering the right tools, verifying physical clearance inside your chassis, and handling sensitive circuit boards correctly turn a seemingly complex technical project into a straightforward afternoon task. Taking a methodical approach also helps you troubleshoot initial power quirks and optimize thermal performance before installing your operating system. With careful planning and attention to detail, you can create a reliable system tailored specifically to your computing and gaming goals.

Pros
- Clear, beginner-focused instructions make PC building approachable for teens and new builders
- Teaches valuable skills like component selection, installation, cable management, and basic troubleshooting
- Encourages smart budgeting and customization so you can build a gaming PC that fits your needs
- Portable paperback format is easy to reference while working at your desk or workbench
Cons
- Does not include actual components or tools; you‘ll need to purchase parts separately
- Some builders may prefer video tutorials for visual learning over written step-by-step guides
- Limited depth for advanced builders or those building high-end custom loop liquid cooling systems
Building your own gaming PC is one of the most rewarding steps you can take as a gamer or tech enthusiast. This book, ‘Build Your Own PC: A Step-by-Step Guide for Teens,‘ from Majosta, is designed to walk beginners through the entire process. Whether you are a teen looking to assemble your first gaming rig, a college gamer wanting a custom setup for your dorm, or a casual gamer ready to move beyond pre-built systems, this guide aims to make the journey straightforward and enjoyable.
The book focuses on the practical essentials: understanding each component‘s role, choosing compatible parts, and physically assembling them in the correct order. It covers topics like selecting a CPU, GPU, motherboard, RAM, storage, power supply, and case, with an emphasis on gaming performance and budget management. The step-by-step instructions are written in clear, plain language, so you won‘t get lost in technical jargon. The guide also touches on cable management, installing cooling fans, and even basic RGB lighting setup, which is great for builders who want a clean, visually appealing desktop.
For PC gamers and esports hopefuls, building your own machine means you can prioritize the components that matter most for low-latency performance and high frame rates. This book helps you understand how each part affects gaming responsiveness, from GPU and CPU choices to RAM speeds and storage types. It also includes tips on setting up the BIOS and installing an operating system, so you can get straight to gaming or streaming after assembly. While the book doesn‘t cover advanced overclocking or liquid cooling in depth, it gives you a solid foundation to build upon.
In terms of practicality, the paperback format (6 x 0.21 x 9 inches) is compact enough to lay flat on your workbench or desk. The binding allows you to keep it open while you work. The instructions are logically organized, with checklists and diagrams (though the exact visuals aren‘t detailed in the product listing, user feedback suggests they are helpful). One realistic limitation is that this is a written guide, so hands-on learners might want to supplement with online videos. However, many users appreciate having a physical reference they can mark up and flip through without worrying about screen glare or battery life.
Maintenance and upgradability are also addressed, which is valuable for long-term use. You‘ll learn how to clean fans, replace thermal paste, swap GPU, and add more storage as your gaming library grows. This knowledge extends the life of your build and makes future upgrades less intimidating. For streamers and content creators, knowing your hardware inside-out helps when troubleshooting performance bottlenecks or planning a workstation-focused build.
Overall, if you are a teen or a first-time builder who wants to dive into the world of custom PCs, this book is a trustworthy starting point. It won‘t teach you every advanced trick, but it will give you the confidence to choose parts, assemble them safely, and power on a gaming rig that‘s uniquely yours. For the price, it‘s a smart investment before you spend hundreds on components. I‘d recommend it to any U.S. PC gamer, gaming setup builder, or work-from-home gamer looking for a clear, affordable guide to building your own desktop.
This guide is specifically written for teens and beginners who have little to no experience building PCs. It‘s ideal for: PC gamers who want to build a custom gaming rig on a budget; college gamers setting up a dorm room desk; streamers and content creators who need a reliable, upgradable system; and any U.S. gamer interested in learning how to assemble their own computer for gaming, school, or work. The step-by-step approach makes it a great resource for parents helping their kids build a first PC, or for anyone who feels intimidated by the process.
The book covers everything from component selection (CPU, GPU, motherboard, RAM, storage, PSU, case) to physical assembly, cable management, installing cooling fans, setting up RGB lighting, configuring BIOS, and installing an operating system. It also includes tips on budgeting, troubleshooting common problems, and performing routine maintenance. By the end, you‘ll have the skills to build a fully functional gaming PC and the confidence to upgrade it in the future.


Pros
- Straightforward, easy-to-follow language perfect for absolute beginners
- Covers the entire build process from planning to first boot
- Helps demystify PC components and compatibility for gaming setups
- Encourages hands-on learning without overwhelming technical jargon
- Compact size allows you to keep it near your build station without taking much space
Cons
- Not intended for experienced builders looking for advanced overclocking or modding tips
- Only available in paperback format, no digital version for quick searches
- Some topics may feel too basic for those already familiar with PC hardware
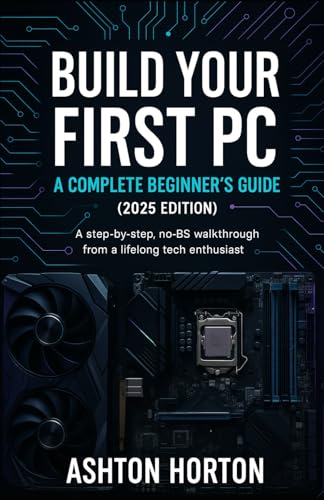
If you are a PC gamer, streamer, or content creator who has always wanted to build your own gaming rig but felt intimidated by the process, Build Your First PC: A Complete Beginner's Guide (2025 Edition) is exactly the resource you need. This no-BS walkthrough, written by a lifelong tech enthusiast, strips away all the confusing jargon and gets straight to what matters: building a reliable, performant gaming PC from scratch.
This guide is best suited for first-timers: college gamers setting up their dorm room battlestation, work-from-home gamers looking to assemble a dual-purpose desktop, or gaming PC buyers who want to understand exactly what goes into a custom build before making component purchases. The book covers everything from selecting compatible parts (CPU, GPU, motherboard, RAM, storage, PSU, case, and cooling) to physically assembling them and installing an operating system. The step-by-step approach is clear and methodical, so you never feel lost.
In terms of real-world usefulness, this guide directly addresses the common pitfalls that trip up new builders. It explains how to handle delicate components, manage cables for airflow and aesthetics, and ensure your system boots without issues. While it does not cover overclocking or extreme custom loops, it more than delivers on helping you get a stable, high-performance gaming PC ready for esports, casual gaming, or streaming on Twitch or YouTube. The peace of mind from following a proven process is invaluable.
Build quality of the book itself is solid: a compact paperback with dimensions of 5.5 x 0.16 x 8.5 inches, making it easy to prop up or stash near your workbench. The binding is durable enough to withstand multiple uses, and the print is clear. The content is well-organized, with logical chapters that build on each other. No software or digital extras are included, but the text is rich with practical advice that does not rely on flashy gimmicks.
One realistic limitation is that this book is strictly a beginner's guide. If you already know the difference between an ATX and ITX motherboard or have assembled a PC before, this may feel too basic. It does not cover advanced topics like custom water cooling, RGB lighting synchronization, or software tuning. However, for its target audience, it hits the mark perfectly. Maintenance and troubleshooting are covered at a high level, but the focus remains on successful first-time builds.
Overall, Build Your First PC is a practical, trustworthy companion for anyone taking their first steps into PC building. It removes the guesswork and builds confidence, making it a smart addition to a gaming setup builder's toolkit. If you are a competitive gamer, casual player, or streamer who wants to learn the ropes without spending hours on YouTube tutorials, this guide is a solid buy that will save you time, frustration, and potentially costly mistakes.
Pros
- Straightforward language makes complex PC building concepts accessible for new gamers
- Covers component compatibility, which helps avoid costly mistakes when ordering parts
- Includes practical advice on cable management and airflow for a tidy gaming desk setup
- Compact size easy to keep near your build area for quick reference
Cons
- As a printed guide, it doesn't include real-time updates on the latest parts or prices
- Some advanced topics like overclocking or custom water cooling are not covered in depth
- Limited to 0.07 inches thick, so content is concise and may skip details some users want
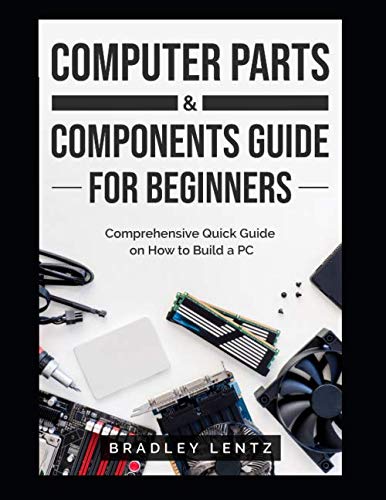
The Computer Parts and Components Guide for Beginners by Majosta is a quick reference paperback aimed at U.S. PC gamers who are building their first custom gaming rig. This guide focuses on the essentials: picking compatible CPUs, GPUs, motherboards, RAM, storage, and power supplies, plus step-by-step assembly instructions.
This book is best suited for PC gamers, competitive gamers, and esports players who want to build their own gaming setup rather than buying a prebuilt. Streamers and content creators will also find value in the sections on storage and GPU choices for recording or streaming. Casual gamers and college gamers on a budget can use the guide to understand which parts offer the best price-to-performance.
From a real-world performance standpoint, the guide emphasizes choosing components that deliver low-latency gameplay and high frame rates. It explains how CPU and GPU combinations affect responsiveness in FPS and MOBA games. The book also covers cooling and airflow basics, which directly impact sustained performance during long gaming sessions. While not a deep dive into overclocking, it gives enough to get a reliable, stable build.
Build quality and practicality are core themes. The guide advises on durable frame materials for PC cases, tempered glass panels, and mesh airflow designs. It offers practical cable management tips to keep the desk clean and improve airflow. For RGB enthusiasts, there is a short section on integrating lighting strips and fans without complicating the build.
Setup and maintenance are straightforward: the guide walks through each step from unpacking components to powering on for the first time. It also includes advice on software setup for drivers and BIOS. The main limitation is that a printed book cannot update with the latest hardware releases, so users should check online for current part availability and pricing.
Overall, this guide is a solid purchase for any PC gaming buyer, gaming setup builder, or work-from-home gamer looking to assemble their own system. It is not a comprehensive encyclopedia, but it delivers exactly what the title promises: a quick, clear guide for beginners. If you're new to building and want a straightforward start without getting lost in forums, this paperback is a practical companion for your first build.

Pros
- Clear, easy-to-follow instructions suitable for all skill levels.
- Covers a wide range of topics from component selection to final assembly.
- Focuses on practical performance and reliability for gaming and streaming.
- Portable paperback format is convenient to reference during your build.
Cons
- As a book, it lacks hands-on interactivity or video demonstrations.
- Some advanced builders may find the content too basic for their needs.
- Limited to general advice; specific hardware recommendations may become outdated.
Build the Ultimate Gaming PC: A Step-by-Step Guide for Gamers is a practical paperback resource designed to help PC gamers, streamers, and gaming setup builders create their ideal rig. Whether you're a first-time builder or someone looking to refine your approach, this guide breaks down the entire process from selecting components to assembling and optimizing your system. It's a solid companion for anyone serious about building a high-performance gaming PC tailored to their needs.
This guide is best suited for PC gamers who want to take control of their gaming experience, competitive gamers aiming for low-latency performance, and streamers or content creators who need a reliable, powerful workstation. It also appeals to gaming setup builders and RGB enthusiasts who care about aesthetics and cable management. The step-by-step format makes it accessible for college gamers and work-from-home users alike, offering practical advice that applies to a wide range of builds.
In terms of real-world performance, the guide emphasizes component selection that directly impacts gaming responsiveness, input accuracy, and overall system reliability. It covers topics like choosing the right CPU, GPU, and memory for smooth gameplay, as well as cooling solutions to maintain airflow and prevent thermal throttling during long sessions. For streamers, there's guidance on building a rig that handles encoding and multitasking without lag, while casual gamers will appreciate tips for balancing performance with budget.
Build quality and practicality are central themes throughout the book. It discusses the importance of durable frames, mesh airflow designs, and tempered glass panels for aesthetics and cooling. The guide also touches on cable management techniques to keep your desk setup clean and organized, which is a big plus for anyone who values a tidy gaming space. While it doesn't cover specific accessories like mechanical switches or high-DPI sensors in depth, it provides a solid foundation for understanding how these components fit into a complete build.
Ease of setup is a key strength of this guide. It walks you through each step logically, from preparing your workspace to installing the operating system and drivers. The paperback format is easy to reference while working, though some users might prefer a digital version for quick searches. Maintenance tips are included to help you keep your system running smoothly, such as cleaning dust filters and updating software. One realistic limitation is that the book's advice is general, so you may need to supplement it with online resources for specific hardware compatibility or troubleshooting.
Overall, Build the Ultimate Gaming PC is a worthwhile investment for anyone planning a new gaming PC build or upgrade. It offers clear, actionable advice that can save you time and money while helping you achieve a setup that performs well for gaming, streaming, or content creation. While it won't replace hands-on experience or community forums, it's a reliable starting point that covers the essentials. For U.S. gamers looking to build their dream rig with confidence, this guide is a practical addition to your toolkit.
A Systematic Walkthrough for Assembling Your Desktop PC
Assembling a personal computer requires patience, clear organization, and a disciplined sequence rather than specialized engineering skills. When you understand how to build a computer step by step, the entire process breaks down into logical physical milestones that safeguard your investment. Each part connects only in designated orientations, which minimizes the likelihood of catastrophic wiring errors when you follow official manufacturer documentation. Setting realistic assembly expectations and checking your parts list beforehand prevents mid-build delays and keeps your workspace orderly.
Essential Workspace Preparation and Assembly Safety
Creating an organized, static-safe workspace establishes the foundation for a smooth build process. You should assemble your desktop on a large, non-conductive surface such as a clean wooden desk or dining table while avoiding carpeted flooring whenever possible. Keep a magnetic number two Phillips screwdriver nearby alongside small dishes or bowls to organize loose chassis screws and motherboard mounting hardware. Touching a grounded metal object before handling sensitive components helps dissipate ambient electrostatic charges that could otherwise harm fragile microchips.
Unboxing your components methodically prevents accidental physical damage to sensitive connector pins and delicate circuit boards. Keep all original component packaging, spare screws, and documentation neatly stacked until your computer successfully posts to the basic input-output system. Component user guides contain critical pinout schematics and mounting diagrams that clarify tricky cable orientations and screw types. Taking a few extra minutes to clear clutter and review hardware manuals reduces stress before you unwrap the motherboard.
Pre-Installation Bench Inspection and Motherboard Staging
Installing core components onto the motherboard before sliding it into the computer chassis saves significant time and hand strain. Place the motherboard directly on top of its cardboard packaging box to create a sturdy, non-conductive staging bench. Inspect the processor socket carefully for bent pins or manufacturing debris before lifting the retention arm. When aligning modern central processing units, locate the small golden triangle etched onto the corner of the processor and align it precisely with the matching socket marking. Lower the chip gently into place without applying downward force, then secure the retention latch.
Solid-state storage installation represents the next logical milestone while the motherboard remains easily accessible on your desk. Locate the primary M.2 slot, which normally rests directly beneath the processor socket to utilize direct high-speed lanes. Remove any pre-installed aluminum heatsink and check that the mounting standoff matches the length of your solid-state drive module. Slide the storage drive into the slot at a thirty-degree angle until it seats firmly, then secure it using the provided retention screw or toolless latch. Replace the thermal heatsink after removing its protective blue plastic film to ensure direct heat transfer.
Installing the Memory Modules in Dual-Channel Mode
System memory must sit in designated slots to activate dual-channel bandwidth and provide optimal data throughput for gaming workloads. If you are comparing hardware capabilities for a high performance gaming desktop, proper memory bandwidth prevents communication bottlenecks between the processor and graphics engine. Most modern motherboards with four slots recommend populating slots two and four, counting outward from the central processing unit socket. Consult the motherboard user manual to verify your specific board topology before pressing modules into place.
Seating random-access memory requires firm, even downward pressure until the retaining latches click closed automatically. Open the retention clips on either side of the chosen memory slots and inspect the off-center alignment notch along the bottom edge of each module. Align this notch with the ridge inside the memory channel to prevent incorrect orientation. Press straight down on both ends of the memory stick simultaneously with steady thumb pressure. A distinctive audible click confirms that the retention tabs have locked the stick into electrical contact.
Mounting the CPU Cooler and Thermal Interface Material
Mounting the central processing unit cooler correctly prevents thermal throttling and protects silicon longevity during intense computational tasks. Many entry-level cooling units arrive with pre-applied thermal paste, whereas aftermarket coolers usually include a separate syringe of thermal compound. If your cooler has an exposed copper base, inspect it thoroughly and peel away any transparent plastic shipping film before proceeding. Leaving that protective film intact traps intense heat, which quickly triggers emergency thermal shutdowns during preliminary testing.
Apply a pea-sized dot or small cross pattern of thermal paste to the center of the integrated heat spreader if none is pre-applied. Lower the heatsink squarely onto the mounting bracket standoffs to spread the paste evenly across the metal lid. Tighten the retaining spring screws in an alternating diagonal pattern to ensure balanced mounting pressure across the processor die. Once secured, connect the cooler fan wire directly to the motherboard header labeled CPU_FAN so the system bios can control fan curves based on actual core temperatures. Check that cooling fan blades do not collide with adjacent memory heat spreaders.
Preparing the Case and Installing the Power Supply Unit
Preparing your computer chassis before installing the motherboard creates sufficient working room for cable routing and cooling components. Remove both side panels and check whether the case uses an integrated rear input-output shield or requires a snap-in metal plate. If your chassis requires a separate shield, push it firmly into the rear opening from inside the case until all four corners click into place. Count the pre-installed brass standoffs inside the main chamber to confirm they match the mounting hole layout of your specific motherboard format.
Power supply installation depends largely on chassis design, cooling intake vents, and cable configuration. If you are using a fully modular unit, connect your essential power lines, such as the 24-pin main motherboard cable, 8-pin processor cable, and PCIe graphics lines, before sliding the unit inside. Slide the power supply into its basement chamber with the intake fan facing downward toward the filtered bottom ventilation intake. Secure the unit through the rear exterior frame using the four coarse-threaded screws provided with the chassis. Keep all unused modular cables in a separate pouch for potential future expansion.
Securing the Motherboard and Managing Chassis Cables
Lowering the pre-assembled motherboard into the chassis requires gentle maneuvering to align the rear ports with the input-output cutout. Guide the motherboard into the chassis at a slight backward angle so the external ports slide cleanly through the shield openings without catching ground tabs. Check that every brass standoff underneath lines up directly with a reinforced motherboard screw ring. Drive the motherboard screws into place snugly using your magnetic screwdriver, but avoid overtightening to prevent cracking the fiberglass printed circuit board.
Routing primary wiring before installing your bulky graphics card keeps the interior tidy and preserves airflow channels. Connect the broad 24-pin main motherboard power harness along the right edge and thread the 8-pin processor power cable to the top-left corner. Attach the front-panel power switch, reset switch, and drive activity light leads to the system pin block according to the motherboard pinout diagram. Insert the front USB 3.0 connector carefully into its header, taking extra caution to avoid bending the tiny internal pins during insertion.
Seating the Graphics Card and Securing PCIe Power
The dedicated graphics card delivers the visual horsepower necessary to render demanding video games at acceptable frame rates. When examining different configurations, including balanced entry level gaming desktop configurations, the graphics card consistently occupies the primary PCIe x16 slot. Unscrew and remove the appropriate metal expansion slot covers on the rear chassis panel directly opposite the primary slot. Ensure the slot retention lock at the end of the PCIe channel is toggled open before sliding the card inward.
Press the graphics card straight into the top PCIe slot until you hear the retention clip snap into the locked position. Secure the metal mounting bracket to the chassis frame with screws to support the physical weight of the card and prevent socket sag. Connect dedicated PCIe power cables from your power supply directly to the card power sockets. Avoid daisy-chaining a single split cable for high-power cards, as running independent power cables from the power supply delivers cleaner, more reliable electrical currents during heavy gaming spikes.
The First Power-On Self-Test and BIOS Configuration
Connecting external cables properly guarantees that your initial power-on sequence displays video output on your monitor. Plug your display cable directly into a video port on the graphics card rather than the motherboard video output ports. Connect the power cable to the wall outlet and toggle the master rocker switch on the back of the power supply to the on position. Press the case power button and observe internal cooling fans, illumination, and motherboard debug indicator lights as the hardware initiates its power-on self-test.
Repeatedly tap the delete key or F2 key on your keyboard as the computer powers on to enter the unified extensible firmware interface. Check the initial setup screen to verify that the firmware correctly detects your processor model, installed memory capacity, and connected storage drives. Navigate to the memory configuration tab and enable the extreme memory profile or extended profiles for overclocking so your memory runs at its rated speed. Confirm that boot priority targets your operating system installation drive, save your settings, and restart the computer. Adjust internal fan curves to maintain balanced acoustics before exiting the firmware utility.
Operating System Installation and Driver Initialization
Installing your operating system transforms bare hardware into a fully functional personal computing environment. Insert a prepared bootable USB drive containing modern operating system installation files into a rear input-output port and turn on the machine. Follow the installation wizard prompts, select your primary high-speed solid-state drive as the target destination, and complete the preliminary software setup. Allow the system to restart naturally during the installation process without removing the storage medium until the initial desktop screen appears.
Completing hardware setup requires installing current chipset drivers and graphics drivers directly from official component manufacturer websites. Chipset drivers establish efficient communication pathways between your processor, storage interfaces, and auxiliary motherboard channels. Download the latest dedicated graphics drivers to unlock complete display resolution options, monitor refresh rates, and hardware acceleration features. Run operating system updates to install security patches, then reboot the machine to ensure all system services initialize properly. Remember to manually set your display refresh rate in advanced display settings to match your gaming monitor specifications.
Thermal Validation and Initial System Stability Checks
Verifying system stability and operating temperatures confirms that your hardware installation was executed safely and correctly. Install reputable hardware monitoring utilities to observe idle temperatures for your processor and graphics card inside your operating system. Normal desktop temperatures should remain steady without unexpected spikes when no background applications are running. If idle processor temperatures climb unusually high, power down the system to verify that the cooler bracket maintains firm contact and that the fan spins freely.
Running a balanced computing workload or hardware benchmark allows you to evaluate thermal behavior and fan profiles under realistic gaming strain. Listen for irregular buzzing sounds, fan rattles, or cable interference inside the chassis while the internal fans ramp up their rotational speed. Verify that case intake fans draw cool air into the chassis while exhaust fans efficiently expel warm air out the rear and top vents. Stable operational temperatures and quiet acoustics during baseline testing demonstrate that your custom assembly is ready for regular gaming and productivity sessions.
Completing a custom personal computer build rewards you with a deep understanding of desktop hardware architecture and practical maintenance skills. By methodically assembling each component, observing static precautions, and validating system firmware settings, you ensure your machine operates reliably under demanding computing loads. Keeping component packaging, spare mounting brackets, and documentation safe will streamline future hardware upgrades and component replacements as your gaming requirements evolve.




Write Your Review
No reviews yet. Be the first to share your experience!