
Connecting a gaming device to an ultra-high-definition television often leads players to wonder how display resolution, refresh rates, and input latency interact on a modern panel. Learning how to optimize console for 4k gaming requires balancing TV picture modes, cable bandwidth, and the internal hardware limitations of your system. While modern high-end platforms deliver native pixel counts, compact emulation devices and plug-and-play sticks focus primarily on clean upscaling over high-definition multimedia interfaces. Understanding these hardware boundaries helps you extract responsive gameplay, vibrant colors, and sharp text without introducing noticeable controller latency.
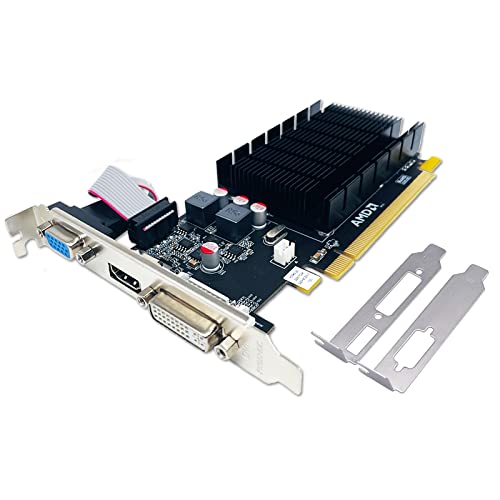
Many players transition between dedicated living-room PCs and compact TV-connected consoles depending on whether they prefer modern competitive titles or classic retro emulation. If you want true native rendering across demanding games, examining a dedicated graphics card guide highlights the processing power needed to drive eight million pixels continuously. On compact micro-consoles, optimization centers on proper power delivery, display scaling, and low-latency television settings rather than overclocking graphics silicon. Taking a few minutes to configure your hardware correctly ensures you avoid common pitfalls like stuttering, washed-out colors, or wireless controller disconnects.

Optimizing TV Consoles and Compact Hardware for 4K Displays
Achieving clear visuals and responsive controls on an ultra-high-definition television requires a deliberate setup process. Modern 4K panels display four times the pixels of standard high-definition screens, which means any signal mismatch or improper picture setting quickly degrades visual fidelity. Whether you connect an entry-level retro stick or a custom living-room computer, your setup directly determines gameplay responsiveness. Following a methodical configuration process prevents blurry scaling, high input latency, and annoying controller dropouts.
Understanding 4K Output Versus Native 4K Rendering
Hardware specifications often list 4K HDMI support, but buyers must differentiate between signal output and internal rendering resolution. Compact micro-consoles like the Nikodocr Retro Gaming Console 4K HDMI for TV provide an HDMI output signal compatible with 4K television inputs. Internally, the emulation chipset processes classic retro titles at their original native resolutions before upscaling the final video feed to match your television port. This approach ensures older software renders cleanly without overburdening small, energy-efficient system-on-chip components.
True native 4K rendering demands immense computing power that only high-tier desktop systems and dedicated graphics processors can reliably deliver. When a system renders eight million individual pixels per frame in real time, the graphics pipeline requires substantial memory bandwidth and advanced thermal cooling. Plug-and-play television sticks prioritize compact form factors and pre-configured retro libraries over heavy graphical rendering. Recognizing this hardware boundary prevents unrealistic expectations while allowing you to focus on the display settings that actually improve your picture.
Video upscaling methods on modern displays also influence how clear your image appears. Modern televisions feature internal upscalers designed to stretch incoming standard-definition feeds across their entire pixel grids. However, letting the source device deliver a stable, fixed resolution often produces cleaner edges than forcing the television to interpret variable low-resolution signals. Checking your television display information banner confirms the exact resolution and refresh rate your console currently transmits.
Configuring Modern 4K Television Settings for Low Latency
Default television picture modes introduce significant processing delays that hurt your gaming experience. Standard, cinema, and vivid presets route incoming video signals through heavy digital smoothing filters, motion interpolation engines, and dynamic contrast algorithms. While these features make streaming movies look dramatic, they buffer frames and create noticeable delay between pressing a button and seeing the action on screen. Enabling your television dedicated Game Mode bypasses this secondary image processing to slash input lag dramatically.
HDMI port configuration represents another critical step when pairing compact hardware with high-definition screens. Many television manufacturers reserve full-bandwidth features, such as enhanced HDMI color formats and low-latency passthrough, for specific numbered ports on the chassis. Inspecting the physical labels on your television helps you select an input designated for high-speed gaming or standard 60 Hz signals. Accessing the external input menu and toggling the port setting from standard to enhanced ensures uninterrupted audio and video communication.
Sharpness adjustments on 4K televisions require special attention during retro or casual gaming sessions. Artificial sharpness sliders do not add real detail to the image; instead, they draw white halos and harsh outlines around high-contrast edges. Reducing the sharpness control close to zero preserves authentic pixel art and prevents jagged artifacts across retro game menus. Similarly, disabling all noise reduction and edge enhancement options keeps fast-moving retro sprites crisp and legible.
Display Aspect Ratios and Integer Scaling for Emulation
Classic video games were authored specifically for cathode-ray tube televisions that utilized a 4:3 display ratio. Modern 4K televisions feature widescreen panels with a native 16:9 aspect ratio. If your console or television forces retro content into a full 16:9 stretch, character proportions become distorted, circular objects turn into wide ovals, and horizontal scrolling feels uneven. Adjusting the display ratio setting within your television menu or console configuration back to standard 4:3 restores proper visual geometry.
Integer scaling provides the sharpest possible visual output when blowing up low-resolution retro titles onto large modern screens. This technique multiplies pixel dimensions by whole numbers, such as doubling or tripling pixel blocks, rather than applying blurry bilinear filtering. Some emulation sticks incorporate basic scaling toggles within their emulator core menus, which you can access via controller button combinations. If your device supports integer scaling, enabling it eliminates the fuzzy look common to poorly scaled retro graphics.
Black pillar boxes on the left and right sides of your screen are completely normal when viewing retro games in their authentic aspect ratio. Many players mistakenly believe these black borders indicate an incorrect video setting or display malfunction. In reality, pillar boxing proves that your panel maintains authentic pixel geometry without stretching sprites across inappropriate dimensions. Embracing correct aspect ratios ensures classic artwork looks exactly as the original game developers intended.
Power Delivery and Thermal Stability on HDMI Stick Hardware
Power instability causes frequent crashes, erratic controller inputs, and spontaneous reboots on compact HDMI gaming consoles. Many television sets include built-in USB service ports that output only minimal electrical current, often limited to half an amp. Connecting a micro-console power lead to an underpowered television USB port frequently starves the internal processor during intense emulation scenes. Using an external wall adapter rated for adequate amperage provides the stable voltage required for reliable long-term operation.
Thermal buildup represents another operational risk for miniature console sticks hidden directly behind warm television displays. Televisions generate substantial ambient heat from their internal power boards and backlights, creating warm pockets near rear connection panels. If a compact stick lacks sufficient airflow, the processor throttles performance to protect its circuitry, leading to sudden frame drops and visual stutter. Utilizing a short HDMI extension lead allows you to position the stick away from hot exhaust vents.
Inspecting power cables for wear or loose connections helps eliminate unexpected hardware behavior. Thin or damaged micro-USB cables introduce electrical resistance that drops operating voltage below stable thresholds. Ensuring tight connections at both the wall plug and the device power socket keeps the internal storage card and memory modules safe from abrupt power loss. Stable power delivery remains one of the simplest ways to maintain smooth emulation across prolonged gaming sessions.
Minimizing Wireless Controller Latency and Signal Interference
Wireless input responsiveness directly dictates how enjoyable platforming, fighting, and racing games feel on modern screens. Most compact retro sticks, including the Nikodocr dual-controller bundle, utilize dedicated 2.4 GHz wireless USB receivers to transmit button inputs. Plugging this receiver directly behind a massive metal television chassis can obstruct radio signals and cause dropped inputs or delayed responses. Inserting a small USB extension cable brings the wireless receiver into direct line of sight with your seating area.
Household electronics operating on the 2.4 GHz spectrum can introduce intermittent radio interference with wireless gamepads. Wi-Fi routers, smart home hubs, and wireless audio soundbars compete for identical frequency channels in modern living rooms. Positioning your gaming console slightly away from active network hardware preserves a clear communication path for controller signals. This simple physical adjustment prevents frustrating input lag during fast-paced arcade gameplay.
Battery maintenance in wireless controllers plays a significant role in communication stability. When alkaline batteries or rechargeable cells lose voltage, the internal transmitter weakens and response range shrinks noticeably. Replacing depleted AAA batteries with fresh, high-capacity cells ensures maximum transmission strength and instantaneous button registration. Checking battery levels whenever controls feel sluggish solves most wireless communication issues quickly.
Managing TF Storage Cards and File Integrity
Plug-and-play consoles rely heavily on flash memory cards to store operating software, emulator cores, and extensive game libraries. The Nikodocr Retro Gaming Console utilizes a 64GB TF card preloaded with thousands of classic titles across multiple gaming eras. Because the console reads game data and writes save states directly to this card, abrupt shutdowns can corrupt critical file systems. Returning to the main console menu using standard button shortcuts before disconnecting power ensures all temporary data writes finish properly.
Creating a digital backup of your included storage card on a home computer provides valuable peace of mind. Flash memory cards can degrade over time after continuous read and write cycles, particularly under sustained operating temperatures. Inserting the TF card into a computer card reader allows you to create a complete drive image or copy game folders to a secure desktop drive. If a file becomes corrupted later, restoring your backed-up library takes only a few minutes without losing access to your favorite retro titles.
High-quality storage media also improves game loading speeds and reduces menu hitching. Budget memory cards sometimes exhibit slow random read speeds that cause delays when navigating extensive game lists containing thousands of entries. If your device supports card upgrades, cloning the factory filesystem onto a reliable, high-speed micro-SD card from an established manufacturer enhances overall system snappiness. Fast data access keeps emulator navigation smooth and responsive across every retro catalog.
When to Step Up from Micro-Consoles to Living-Room Gaming PCs
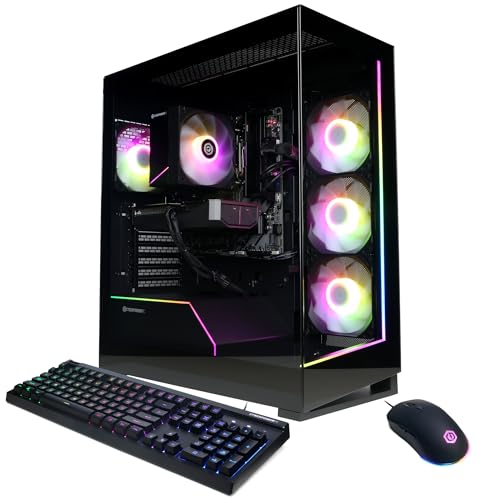
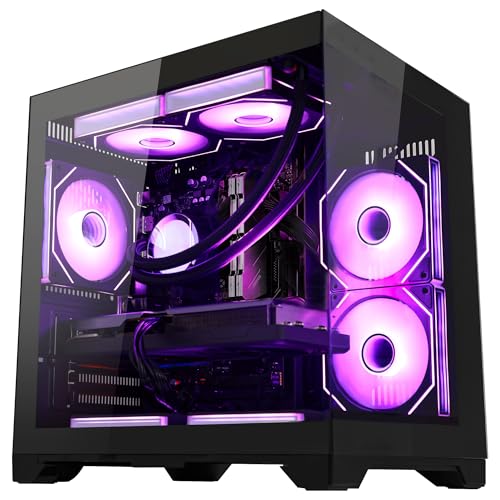
Micro-consoles excel at casual living-room entertainment and classic arcade emulation, but they cannot run modern graphics-intensive releases. When your gaming aspirations expand beyond 16-bit and 32-bit classics toward contemporary high-refresh experiences, a dedicated computer becomes necessary. Exploring budget gaming desktop builds reveals how entry-level tower systems handle native high resolutions, modern shaders, and complex physics calculations that miniature sticks cannot touch.
A living-room gaming computer provides vast customization, superior processing throughput, and comprehensive hardware upgradability. Unlike closed plug-and-play sticks, a desktop computer allows you to install customized operating systems, configure advanced renderers, and apply real-time post-processing filters like CRT shaders. Investigating value gaming PC configurations demonstrates how balanced hardware choices deliver smooth frame rates without demanding unreasonable setup investments. Desktop platforms also support high-bandwidth HDMI 2.1 outputs capable of driving modern 4K panels at 120 Hz with variable refresh rate technologies.
Choosing between a compact TV stick and a desktop computer ultimately comes down to your personal gameplay priorities. If your main goal involves unboxing a device, plugging it into a spare HDMI port, and enjoying childhood arcade memories with family, a dedicated retro stick fulfills that need effortlessly. However, if you plan to conquer modern competitive titles, stream gameplay to friends, or render advanced visual effects, a full-sized gaming PC represents the logical upgrade path. Both hardware formats serve distinct entertainment roles in a modern home entertainment setup.
Practical Optimization Checklist for Television Gaming
Following a reliable setup sequence helps your television gaming hardware operate smoothly from the very first session. Begin by securing a dedicated wall adapter to ensure clean, continuous electrical current to your device. Next, insert your HDMI connection firmly into a high-bandwidth port on the television, using a short extension cable if physical clearance or thermal ventilation demands it. Position any included wireless USB receivers toward your seating area to establish an unobstructed line of sight for smooth wireless transmission.
Once the physical hardware is secured, configure your television picture settings before launching any software. Navigate to the television settings menu, activate Game Mode, adjust the aspect ratio to standard 4:3 for retro emulation, and lower artificial sharpness sliders to prevent edge halos. Verify that motion smoothing algorithms, dynamic noise reduction, and ambient light sensors are completely disabled across the selected input channel. These adjustments eliminate unnecessary latency and restore clean image rendering across every pixel.
Conclude your setup routine by familiarizing yourself with core system navigation commands and safe shutdown procedures. Memorize the button combination required to return to the main selection screen, such as pressing start and select simultaneously on retro gamepads. Always power down the system cleanly rather than yanking the power cable during active gameplay to protect memory card integrity. Taking these straightforward maintenance steps preserves your equipment, stabilizes performance, and delivers responsive entertainment on your 4K television.





Write Your Review
No reviews yet. Be the first to share your experience!