


Unboxing a brand-new gaming chair can feel exciting, but facing a large carton filled with loose bolts, heavy steel brackets, and wrapped foam cushions often brings unexpected hesitation. Understanding how to assemble a gaming chair before tearing open the packaging saves substantial time and prevents frustrating alignment issues later in the build. Most modern gaming seats, from ergonomic racing chairs to wider executive models, share a standard mechanical framework centered on a caster base, pneumatic cylinder, and reclining backrest. Approaching the task with organized preparation ensures every component fits securely without stripping threads or scratching fresh upholstery.
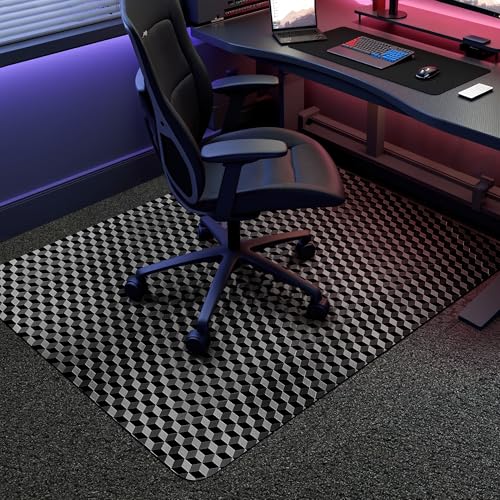
Taking a measured approach to assembly also protects your investment by preventing uneven wear, persistent mechanical creaks, and unstable wobble. When planning your workspace, pairing your seating position with supportive desk accessories, such as an extended desk pad surface, helps ensure your arms rest comfortably relative to your desk height. Checking hardware counts against the manufacturer parts manifest before beginning the build keeps you from getting stuck halfway through the job. Whether your chair features high-density molded foam, pocket-spring cushioning, or synchronized linkage armrests, following proper assembly practices creates a solid foundation for daily gaming and desk work.


Practical Walkthrough for Gaming Chair Assembly and Structural Alignment
Assembling a gaming chair requires systematic attention to mechanical alignment, fastener torque, and component orientation rather than sheer force. While manufacturer instruction sheets provide basic diagrams, they frequently gloss over critical details like hydraulic safety caps, bracket spring tension, and thread seating. Following a disciplined assembly sequence ensures each component locks together securely while protecting moving mechanisms from premature wear.
Organizing Your Workspace and Checking the Hardware Manifest
Before turning any screws, clearing a wide, flat work area is the single most important preparatory step. A clean floor space of roughly six feet by six feet provides ample room to lay out components without scuffing synthetic leather or chipping painted metal. Spreading the flattened shipping carton or a soft utility blanket over hard flooring protects both the chair material and your room surfaces from accidental abrasions. Staging the heavy seat cushion, tall backrest, and five-star steel base in separate zones keeps your build area orderly.
Carefully opening the blister pack of hardware allows you to take stock of all fasteners before beginning. Most gaming chairs supply M8 or M6 hex bolts, spring washers, flat washers, an Allen wrench, and spare hardware for emergencies. Comparing the physical bolts against the included user manual helps identify length discrepancies, as using an overly long bolt in the wrong hole can puncture internal foam. Placing loose fasteners into a small tray or magnetic dish prevents small washers from rolling away under nearby furniture.
Assembling the Five-Star Base and Installing Wheel Casters
The foundation of any mobile desk chair begins with the five-star pedestal base. Invert the star-shaped steel or nylon base so the caster sockets point directly toward the ceiling. Take one caster wheel at a time and align the steel grip-ring stem with the receiving socket hole. Push downward with steady, firm thumb pressure until you feel or hear the internal retention clip snap into position.
Occasionally, a tight socket tolerance makes pushing casters into place by hand difficult. If a caster stem resists entry, angling the pin slightly while pushing often helps compress the split retention ring into the bore. Avoid hitting the plastic wheel bodies with a metal hammer, as sudden impacts can crack the nylon casing or bend the axle. Once all five casters seat flush against the base, flip the pedestal right-side up and test that each wheel swivels smoothly across the floor.
Preparing the Pneumatic Cylinder and Removing the Protective Cap
The pneumatic gas lift cylinder governs seat height adjustment and absorbs vertical shock when sitting. Set the heavy cylinder vertically into the central hub hole of the five-star base with the tapered bottom facing down. Slide the three-stage plastic telescopic dust cover over the cylinder body to shield the lubricated piston from dust and pet hair. Gravity and friction hold this assembly together initially until body weight presses the taper firmly into place.
One crucial detail that frequently halts chair assembly is the small plastic transport cap on top of the cylinder piston. Manufacturers place this bright red, blue, or black cover over the activation button strictly to prevent discharge during shipping. You must pry or pull this protective cap off before attaching the seat pan to the base. Leaving this shipping cap in place completely disables the height adjustment lever, forcing you to dismantle the entire chair later to correct the mistake.
Mounting the Under-Seat Tilt Mechanism and Footrest Rails
Position the seat cushion upside down on top of a raised table or across the empty shipping box for easy access. Locate the heavy steel tilt mechanism plate, which houses the hydraulic adjustment levers and recline tension spring. Look closely at the metal stamping on the mechanism plate to find the engraved arrow indicating the front of the chair. Aligning this arrow toward the front edge of the seat cushion ensures the tilt pivot and height adjustment paddles sit on the correct sides.
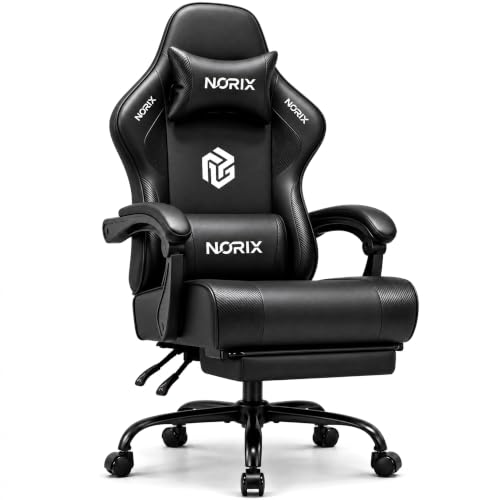
If your model includes an integrated retractable footrest, slide the dual support rails through the under-seat brackets before securing the main plate. Thread all four mounting bolts through the mechanism brackets and into the pre-drilled metal inserts by hand first. Hand-threading prevents cross-threading into the embedded nuts inside the seat base. Tighten the bolts in an alternating cross pattern using the supplied Allen wrench to distribute clamping force evenly across the bottom frame.
Attaching Armrests Across Fixed and Synchronized Designs
Armrest installation methods vary significantly depending on whether your chair uses independent uprights or synchronized linkage arms. Chairs equipped with 3D or 4D adjustable armrests typically mount directly to the bottom of the seat pan with three heavy-duty bolts on each side. When securing independent arms, pay close attention to the directional stamps marked left and right on the mounting flanges. Leaving the mounting bolts slightly loose at this stage allows you to slide the armrests inward or outward to match your preferred shoulder width before final tightening.
Linkage armrests, commonly found on chairs with extendable footrests, connect to both the seat pan and the reclining backrest via pivoting pivot joints. These synchronized arms feature internal plastic or bronze bushings that allow the arm pads to pivot smoothly as the backrest reclines. When bolting linkage armrests, avoid over-torquing the hinge pins, as excessive pressure can crush the plastic washers and cause stiff, squeaky motion. Ensure every pivoting connection moves freely through its complete arc before snapping decorative screw caps into place.
Fastening the Reclining Backrest Without Binding Brackets
Connecting the high backrest to the seat cushion requires extra care around the spring-loaded metal hinge brackets. Never pull the recline angle handle while the side brackets are unbolted from the backrest. The internal spring mechanism holds substantial tension and can snap forward with enough force to pinch fingers or damage components. Keep the recline mechanism in its upright locked position while you align the components for assembly.
Rest the backrest upright between the dual steel upright brackets protruding from the rear of the seat pan. Start by hand-threading the top bolt on one side just two or three turns, then move to the opposite side to start the corresponding bolt. Keeping all bolts loose initially gives you the necessary wiggle room to align the remaining lower screw holes with the threaded inserts buried beneath the upholstery. Once all four backrest bolts engage properly, tighten them down firmly in an alternating sequence and secure the decorative plastic side covers over the exposed metal brackets.
Joining the Upper Seat to the Gas Lift Base Assembly
With the upper seat, armrests, and backrest fully assembled, you can now connect the upper structure to the rolling base. This step requires lifting the combined upper assembly, which can weigh thirty to forty pounds depending on the steel frame thickness. Hold the seat base firmly with both hands and align the round central receiver hole of the tilt mechanism directly over the top pin of the gas cylinder. Lower the seat straight down onto the piston without rocking or twisting the chair horizontally.
Once the tapered receiver rests squarely on the cylinder, sit down gently in the center of the seat cushion. Your natural body weight drives the male taper of the cylinder deeply into the female socket of the tilt plate, creating a rigid mechanical friction lock. Stand up and pull the height adjustment paddle upward to verify that the internal gas pressure smoothly lifts the seat to its highest setting. Sit down again while holding the lever open to confirm that the cylinder lowers evenly under load without catching or sticking.
Handling Specialized Configurations for Floor Rockers and Wide Chairs
Not every gaming seat follows the standard five-star wheeled pedestal format. Floor gaming rockers, including folding audio chairs, feature a completely different structural assembly that eliminates the gas cylinder and base plate entirely. These chairs typically arrive folded in half, requiring you to unfold the hinged backrest until the internal ratchet or locking brackets click into place. Securing a heavy-duty fabric hook-and-loop flap across the rear hinge stabilizes the frame and conceals the folding joint.
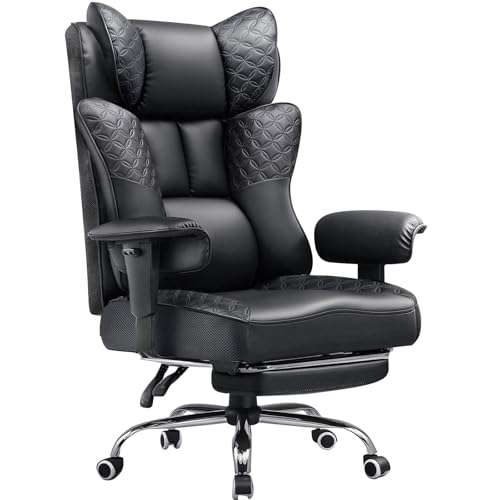
Wider executive gaming chairs and wingless seat models often incorporate pocket-spring cushion cores and heavier cross-bracing. When assembling wider models, verifying that the seat pan sits completely parallel to the floor before tightening the base bolts is particularly important. A wider cushion exerts greater rotational leverage on the tilt mechanism, making proper bolt torque essential to prevent future creaking. Take extra care to ensure any auxiliary cables for lumbar vibration or sound systems route cleanly away from moving recline hinges.
Post-Assembly Alignment, Clearance Checks, and Ergonomic Tuning
After completing structural assembly, performing systematic mechanical checks ensures your chair operates smoothly during extended sessions. Test the backrest recline lever through its full operational range, which commonly spans from an upright ninety degrees to a relaxed one hundred thirty-five degrees. The backrest should lock securely into each notched position without slipping or producing loud popping noises. Check that the lumbar cushion and headrest straps adjust freely along the spine without pinching against the side bolsters.
Roll the completed chair toward your gaming desk to verify clearance with your physical workspace. Check that the lowest armrest setting slides cleanly under your desk apron so you can sit at a comfortable working distance. Once the chair rolls smoothly into position, check that your armrests slide cleanly under your desktop without bumping into your keyboard tray or catching the edge of a large surface desk mat. Making these initial spatial adjustments helps you achieve a neutral posture where your feet sit flat on the floor and your elbows rest at roughly ninety degrees.
Troubleshooting Assembly Roadblocks, Wobbles, and Mechanical Creaks
If your newly assembled chair wobbles or leans noticeably to one side, the issue usually stems from uneven bolt tension or reversed brackets. Inspect the under-seat tilt plate to confirm that the stamped front indicator points toward the front edge of the cushion rather than the backrest. A backwards tilt plate shifts the center of gravity rearward, creating an unstable rocking sensation and improper seat rake. Loosening the four mounting bolts and re-torquing them gradually in an X-pattern resolves most minor leveling discrepancies.
Mechanical creaking or clicking during backrest movement is another frequent post-assembly complaint. Creaks typically occur when dry metal brackets rub directly against adjacent steel frame components or when mounting bolts loosen slightly under load. Applying a small drop of non-staining silicone lubricant to pivot joints and verifying that all bracket fasteners remain fully tightened usually eliminates annoying noises. Never use harsh solvent sprays on moving chair joints, as penetrating solvents can strip factory grease from internal bearing surfaces.
Difficulty with stubborn bolt holes is often caused by bunched upholstery fabric blocking the internal thread pathways. If a screw refuses to bite, shine a flashlight into the bolt hole to check whether stray synthetic leather or batting overlaps the metal insert. Trimming away clear obstructions with small scissors allows the bolt threads to engage smoothly without risking expensive cross-threading damage. Backing the screw counter-clockwise until you feel a distinct drop into the thread groove helps establish proper alignment before applying torque.
Long-Term Fastener Maintenance and Hardware Inspection Schedule
Mechanical fasteners inevitably loosen over time due to daily shifting, reclining cycles, and micro-vibrations across hard flooring. Setting a calendar reminder to inspect and re-tighten all structural bolts after the first two weeks of use catches initial settling in the cushion frame. Storing the hex wrench in a small zip pouch taped beneath the seat cushion ensures you always have the correct tool ready for seasonal tune-ups. A quick quarterly inspection across armrest bolts and bracket screws keeps the chair feeling solid and rattle-free.
Routine care extends beyond hardware checks to include regular cleaning and caster inspection. Hair, thread, and carpet fibers naturally wrap around wheel axles over months of use, increasing rolling resistance and scratching delicate floors. Popping the casters out of the star base once or twice a year to clean the axles maintains smooth, silent gliding across your workspace. Wiping down polyurethane upholstery with a damp microfiber cloth prevents sweat salts from drying out the synthetic coating over years of daily gaming.
Final Assembly Takeaway and Setup Verification
Completing gaming chair assembly successfully comes down to patience, proper hardware identification, and methodical bolt tightening. Taking the time to seat casters firmly, remove the protective shipping cap, and balance bracket tension ensures your chair delivers its intended mechanical performance. When every fastener is properly torqued and moving joints pivot freely, your seating provides stable support for both competitive gaming and focused desk work. Keeping up with routine bolt inspections ensures that your setup remains dependable and quiet through countless hours at your desk.




Write Your Review
No reviews yet. Be the first to share your experience!