


If your original LG monitor stand is broken, missing, or simply not ergonomic enough, a lg computer monitor stand replacement is a straightforward fix that restores comfort and desk organization. Most LG monitors use standard VESA mounting patterns, meaning they are compatible with a wide range of third-party freestanding mounts, arms, and risers. You do not need a proprietary LG part to get your screen back to eye level or to free up desk space.
The key to a successful swap lies in verifying three specific details: the VESA pattern on the back of your monitor, the total weight of the display, and the available clearance on your desk. Once these specs match the capabilities of the new stand, installation is typically a simple process involving a few screws and the included hardware.
This approach allows you to choose a stand that fits your specific ergonomic needs, whether you prefer a simple height-adjustable riser or a more complex arm with tilt and swivel capabilities, without worrying about brand-specific restrictions.


How to Replace an LG Monitor Stand
Replacing the stand on an LG monitor is primarily a hardware compatibility check followed by a mechanical installation. The process does not involve opening the monitor or modifying its internal electronics. Instead, you are swapping the base unit for a new mounting solution that attaches to the pre-drilled holes on the back of the panel.
This method is safe and reversible, provided you use the correct screws and follow the torque recommendations in the manual. The goal is to secure the monitor firmly to the new stand while maintaining access to all ports and controls.
| Specification | Typical LG Monitor Range | Why It Matters for Replacement |
|---|---|---|
| VESA Pattern | 75x75mm or 100x100mm | Must match the holes on the monitor back |
| Weight Capacity | 15 to 40+ lbs | Stand must support the specific model weight |
| Screen Size | 24 to 32 inches | Ensures the arm or pole is long enough |
| Port Access | Bottom or Side | Check if the new stand blocks connections |
Before purchasing any replacement, you must confirm the VESA pattern of your specific LG model. This is the grid of four screw holes on the back of the monitor. Most modern LG monitors use either a 75x75mm or a 100x100mm pattern. Some older or smaller models might use 50x50mm, which is less common for larger displays.
You can find this information in the user manual or by measuring the distance between the screw holes with a ruler. If your monitor has a 100x100mm pattern, it is generally compatible with stands that support 75x75mm, but the reverse is not true. A stand designed only for 75x75mm will not fit a 100x100mm monitor because the holes are too far apart.
Weight is the second critical factor. A 27-inch LG monitor typically weighs between 12 and 15 pounds, while a 32-inch model can weigh closer to 18 to 20 pounds. The replacement stand must have a weight capacity that exceeds the actual weight of your monitor.
It is safer to choose a stand with a higher capacity than necessary, as this provides a safety margin. For example, a stand rated for 22 lbs is a good fit for a 15 lb monitor, whereas a stand rated for 10 lbs would be unsafe. Always check the product specifications for the maximum load capacity, not just the screen size compatibility.
Here is a checklist to verify before you buy a new stand:
- Measure the VESA hole pattern on the back of your LG monitor.
- Check the weight of your monitor in the manual or on the label.
- Ensure the new stand supports your specific VESA pattern.
- Verify the stand’s weight capacity is higher than your monitor’s weight.
- Check if the stand blocks access to HDMI or USB ports.
- Confirm the stand fits within your desk depth and height limits.
Choosing the Right Mount Type
There are three main types of monitor stands you can use to replace the original LG base. Each offers different benefits depending on your desk space and ergonomic preferences. Understanding these differences helps you select the option that best fits your workflow. The choice often comes down to how much flexibility you need versus how much desk space you have available.
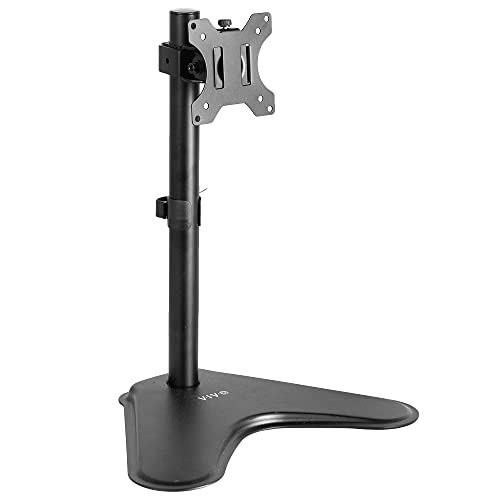
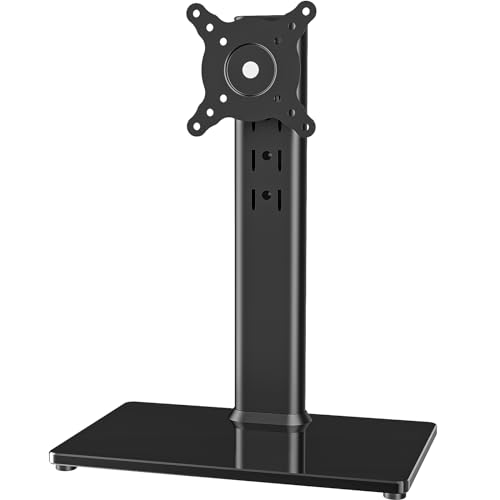
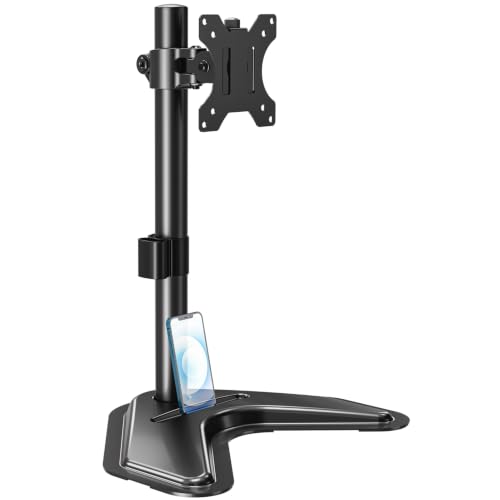
Freestanding desk stands are the most common replacement option. They sit on the desk surface and do not require drilling or clamping. These stands typically feature a base, a vertical pole, and an arm that holds the monitor. They are ideal for users who want to raise their monitor to eye level without modifying their desk. Many freestanding stands offer tilt, swivel, and rotation, allowing you to adjust the viewing angle for comfort. They are also easy to move if you rearrange your workspace.
Monitor arms are another popular choice, especially for those with limited desk space. These arms clamp to the edge of the desk or mount through a grommet hole. They allow you to move the monitor horizontally and vertically with minimal effort. Arms are great for dual-monitor setups or for users who frequently change their viewing position. However, they require a desk with a thick enough edge to support the clamp and may take up more desk edge space than a freestanding stand.
Monitor risers are the simplest option. They are static platforms that elevate the monitor to a higher position. While they do not offer tilt or swivel, they are inexpensive and easy to install. Risers are a good choice if you only need to raise your monitor to eye level and do not require adjustable angles. They also often include cable management channels to keep your desk tidy. If you are on a budget, a riser is a practical and effective solution.
Consider these factors when choosing between mount types:
- Freestanding stands offer the most flexibility without desk modification.
- Monitor arms save desk space but require a compatible desk edge.
- Risers are the most affordable and easiest to install option.
- Check if you need tilt and swivel for ergonomic comfort.
- Ensure the mount type fits your desk depth and height.
Installation Steps and Safety
Installing a new monitor stand is a straightforward process that usually takes less than 15 minutes. The first step is to remove the original stand if it is still attached. This involves unscrewing the four VESA screws that hold the stand to the back of the monitor.
Keep these screws if they are in good condition, as you may need them for the new stand. If the original screws are stripped or damaged, use the new screws provided with the replacement stand. Make sure the monitor is turned off and unplugged before starting the installation.
Next, attach the VESA plate or bracket from the new stand to the back of the monitor. Align the holes on the bracket with the VESA holes on the monitor and insert the screws. Tighten the screws evenly to ensure the bracket is secure. Do not overtighten, as this can damage the monitor or strip the threads.
Once the bracket is attached, mount the bracket onto the stand’s arm or pole. Follow the manufacturer’s instructions for locking the arm or pole in place. Most stands have a quick-release mechanism or a locking knob that secures the monitor in position.
After mounting the monitor, adjust the height, tilt, and swivel to your preferred position. Test the stability of the setup by gently pushing the monitor to ensure it does not wobble or fall. If the monitor feels loose, tighten the locking mechanisms or check that all screws are secure. Finally, plug in the monitor and power it on to ensure all connections are working correctly.
If you encounter any issues, refer to the user manual for troubleshooting tips. For more detailed guidance on setting up your display, you might find our monitor for office work guide helpful for optimizing your workspace.
Common Compatibility Issues
Even with standard VESA patterns, some users encounter compatibility issues when replacing their monitor stand. One common problem is the weight of the monitor exceeding the stand’s capacity. This can cause the stand to wobble or fail over time. To avoid this, always check the weight of your monitor and compare it to the stand’s maximum load capacity. If your monitor is near the upper limit of the stand’s capacity, consider choosing a stand with a higher rating for added safety.
Another issue is the VESA pattern mismatch. Some monitors have a 100x100mm pattern, while others have a 75x75mm pattern. If you buy a stand that only supports 75x75mm, it will not fit a 100x100mm monitor. Conversely, a stand that supports 100x100mm will usually fit a 75x75mm monitor, but you may need spacers. Check the product description for compatibility with both patterns. If you are unsure, measure the holes on your monitor to confirm the pattern.
Port access is another consideration. Some monitor stands have a thick pole or base that can block access to the ports on the back of the monitor. This can make it difficult to connect HDMI, USB, or power cables. To avoid this, check the design of the stand and ensure it leaves enough clearance for your cables.
Some stands have cable management channels that help route cables around the pole, making it easier to access the ports. If you have many cables, consider a stand with a wider base or a design that minimizes obstruction.
Ergonomic Benefits of a New Stand
Replacing your LG monitor stand can significantly improve your ergonomic setup. The original stand may not allow you to position the monitor at the correct height or angle, leading to neck and eye strain. A new stand with height adjustment allows you to raise the monitor so that the top of the screen is at or slightly below eye level. This reduces the need to tilt your head up or down, promoting a more neutral posture. Over time, this can help prevent discomfort and fatigue during long work sessions.
Tilt and swivel features also contribute to better ergonomics. Tilt allows you to adjust the vertical angle of the monitor, reducing glare and improving visibility. Swivel allows you to rotate the monitor horizontally, which is useful if you share your desk with others or if you need to view the screen from different angles. Rotation allows you to switch between landscape and portrait modes, which can be helpful for certain tasks like reading documents or coding. These adjustments help you find the most comfortable position for your body and eyes.
By choosing a stand with these ergonomic features, you can create a workspace that supports your health and productivity. The right stand can make a noticeable difference in how you feel at the end of the day. If you are looking for more tips on setting up a comfortable workspace, our one large monitor vs multiple monitors guide offers insights on display configuration.
Take the time to measure your monitor’s VESA pattern and weight before purchasing a replacement stand. This simple step ensures you choose a compatible and safe option that fits your ergonomic needs. With the right stand, you can enjoy a more comfortable and organized workspace for years to come.





Write Your Review
No reviews yet. Be the first to share your experience!