


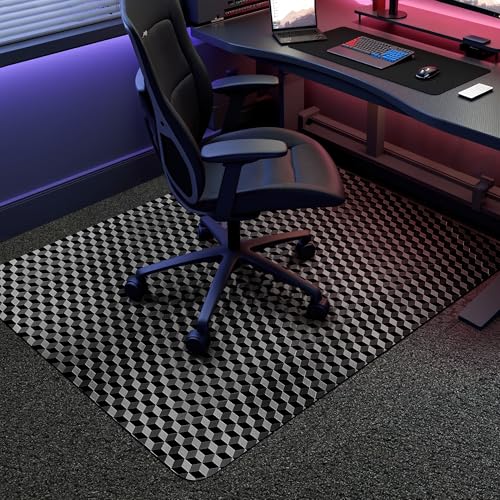
A sudden drop in seat height or an unstable tilt can quickly ruin a focused gaming or work session. Learning how to fix broken gaming chair mechanisms allows desk users to restore stability without immediately discarding a costly piece of furniture. Many common hardware problems stem from worn pneumatic cylinders, loose bolts along the armrests, or debris jamming the wheel casters. Adjusting your seating height also influences how your arms rest relative to peripheral surfaces like spacious desk mats during extended computer sessions. Identifying the specific failing component early prevents minor wobbles from turning into permanent structural damage.
Most gaming chairs rely on standardized modular parts that make home maintenance surprisingly manageable. Whether a chair consistently sinks to the floor or wobbles due to loose plate bolts, targeted repairs save money and reduce unnecessary waste. Assessing cylinder column diameters, weight capacities, and connection joints helps ensure that any replacement part functions safely. This guide covers practical troubleshooting steps, mechanical replacement techniques, and temporary bypass methods to get your chair back into working condition.


Troubleshooting and Repairing Common Gaming Chair Failures
Diagnosing a broken gaming chair begins by isolating whether the failure is pneumatic, structural, or fastener-related. A chair that lowers itself under body weight suffers from a compromised gas cylinder, whereas a persistent wobble typically traces to loose hardware underneath the seat. Addressing these mechanical faults methodically ensures the seat remains safe, balanced, and supportive for everyday desk work.
Identifying Why Your Gaming Chair Keeps Sinking
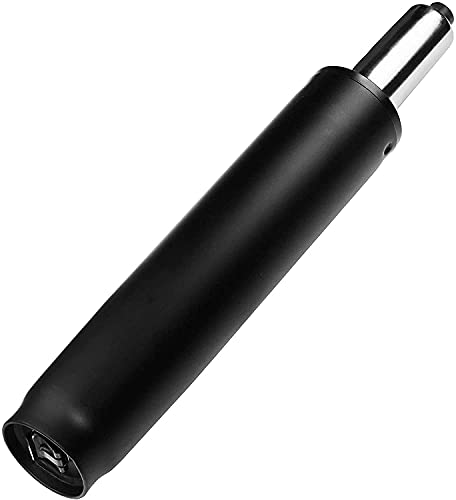
A sinking seat is the most frequent mechanical problem reported by chair owners. Office and gaming chairs depend on a pressurized nitrogen gas cylinder to sustain height adjustments throughout the day. When internal rubber seals degrade or develop microscopic leaks, the chamber can no longer support downward pressure and gradually lowers the seat.
Before ordering replacement hardware, verify that the activation lever is not accidentally pressing against the release valve. The height paddle connects to a mechanical arm that depresses the small piston pin on top of the cylinder column. If the control housing under the seat is bent or jammed with debris, it may keep the valve partially open continuously.
Comparing Sinking Fix Kits with Complete Cylinder Replacement
When facing a sinking chair, you generally have two main repair routes to consider. You can install an external physical collar around the piston shaft or replace the entire pneumatic cylinder. A collar kit, often made of stainless steel segments, clamps directly onto the exposed chrome piston rod to physically block the chair from sliding downward.
Collars offer an affordable, rapid fix that requires no heavy tools or complete disassembly. Multi-segment clamp kits allow users to stack interlocking pieces to create customized fixed heights up to several inches. Heavy-duty stainless steel models provide substantial weight capacities, frequently rated up to eight hundred pounds, ensuring the stopper will not collapse under heavy use. If you rarely alter your desk height, a mechanical stopper kit serves as a dependable long-term solution.
Replacing the gas lift cylinder entirely, on the other hand, restores full pneumatic functionality. A new Class 4 cylinder allows smooth vertical stroke adjustments and full rotational swivel just like a new chair. Choosing between a clamp kit and a replacement cylinder ultimately depends on whether you require dynamic height flexibility.
Step-by-Step Guide to Removing and Replacing a Gas Cylinder
Replacing a gas lift cylinder requires a rubber mallet, a large pipe wrench, penetrating lubricant, and a sturdy work surface. Begin by laying down a protective blanket or cardboard to prevent scratching your flooring. Tip the chair upside down, extend the cylinder fully, and spray penetrating oil around the junction where the cylinder meets the wheel base.
Separating the star base from the bottom of the cylinder comes next. Hold the wheel base firmly with one hand while tapping the bottom center of the exposed cylinder shaft with a rubber mallet. Direct downward strikes against the central hub will gradually break the friction seal holding the tapered joint in place. If the base resists movement, place a small wooden block over the cylinder tip before striking it with firmer blows.
Detaching the upper portion of the cylinder from the seat mechanism plate requires a pipe wrench. Clamp the wrench jaws tightly around the thick top section of the inner piston rod, just below the seat mounting plate. Apply firm leverage to twist the wrench horizontally while pulling outward to break the upper taper fit. Avoid gripping the thin chrome rod if you plan to salvage the cylinder, though strong rotational force is the most effective removal technique.
Installing your new replacement cylinder takes only seconds once the old hardware is removed. Insert the bottom of the new outer cylinder directly into the center hole of the five-star wheel base. Guide the top piston pin into the matching receiver hole on the bottom of the tilt mechanism and sit down to lock the tapered joints securely.
Selecting the Correct Cylinder Size and Stroke Length
Not all replacement cylinders share identical dimensions, making accurate measurements essential before purchasing. The industry standard for most computer and gaming chairs features an outer cylinder diameter of two inches and an inner piston diameter of 1.1 inches. Confirming these column measurements ensures the replacement fits snugly into your existing star base and tilt plate.
Stroke length determines the total height adjustment range available to you. A five-inch stroke cylinder typically measures around ten inches when compressed and extends up to fifteen inches, offering standard height adjustments for typical desk setups. An extended eight-inch stroke cylinder extends from roughly 11.2 inches to over twenty-two inches, which suits taller individuals or higher desk surfaces. Selecting an excessively long stroke can prevent shorter users from resting their feet flat on the floor.
Consider your desk clearance and leg posture when deciding on stroke length. Your elbows should naturally align with your tabletop or peripheral surfaces, such as protective desk pads, without hunching your shoulders. Class 4 heavy-duty cylinders with stated weight capacities of 450 pounds provide robust support columns for long desk sessions. Always verify that the minimum compressed length does not raise your knees uncomfortably close to the desk underside.
Repairing Loose or Wobbling Armrests
Armrests experience constant lateral and vertical torque as users lean, shift posture, or push themselves up from the chair. Over time, this repetitive stress loosens the mounting bolts located beneath the seat cushion. If your armrests rattle or lean outward, the fix usually involves straightforward fastener maintenance on the underside of the chair frame.
Tightening the bolts with an appropriate hex wrench solves minor wobbles immediately. However, if the bolts back out repeatedly after several sessions, apply a small drop of medium-strength blue threadlocker to the screw threads before reassembly. Threadlocker prevents hardware from loosening under cyclic vibrations while still allowing future disassembly with hand tools. Make sure to reinstall any included lock washers to distribute clamping force evenly across the bracket.
Stripped bolt holes in the plywood or steel seat subframe present a more challenging repair. If a bolt spins freely without tightening, inspect the internal threaded tee-nut inside the seat base. You can often replace a damaged tee-nut by peeling back the bottom dust cover fabric and tapping a fresh hardware insert into place. Alternatively, using a slightly longer bolt with a locking nut on the reverse side can restore firm clamping pressure.
Troubleshooting Tilt and Recline Mechanisms
Gaming chair recline systems rely on a ratcheting hinge bracket on the side and a spring-loaded tilt mechanism under the seat. If the backrest refuses to lock into an upright position, inspect the side recline handle and internal gear teeth. Foreign objects, loose pivot pins, or stripped gear ratchets can prevent the spring-loaded locking bar from engaging the teeth. Cleaning away old grease and dirt often allows the teeth to seat properly once again.
The large cylindrical knob under the front of the seat controls tilt rocking tension. Turning this knob clockwise increases spring resistance, which prevents the chair from tipping backward too easily under heavier users. If the chair leans noticeably to one side, inspect the steel plate for metal fatigue or hairline cracks near the central weld. A cracked tilt plate cannot be safely repaired with adhesive and should be replaced immediately to avoid sudden structural collapse.
Squeaking during recline or rocking movements usually indicates friction along internal metal pivot joints. Applying a silicone-based spray lubricant or white lithium grease to the pivot pins and spring coil eliminates annoying noises without attracting excessive dust. Periodic lubrication keeps mechanical linkages operating smoothly and extends the operational lifespan of the hinge.
Fixing Broken Casters and Star Base Sockets
Casters suffer from hair entanglement, carpet grit, and side impacts that degrade smooth floor rolling. If a wheel refuses to turn or drags across the floor, pop the caster stem out of the base socket using a flathead screwdriver for leverage. Clear out accumulated carpet fibers and pet hair from the axle housing using tweezers or a utility knife. Lubricating the axle pin with silicone spray often restores free spinning in older wheels.
When a plastic wheel fractures or the steel stem bends, swapping the caster is straightforward. Most gaming and office chairs utilize universal 11-millimeter grip ring stems with a standard 22-millimeter length. Pull the old caster straight out of the nylon or aluminum star base and push the new stem firmly into the socket until the retaining ring clicks. Be cautious not to purchase 10-millimeter stems, which will wobble in standard sockets.
A cracked caster socket within the five-star base poses a severe tipping hazard. If the metal stem tilts sideways inside the leg socket, the housing has structurally failed under stress. In this scenario, replacing the entire star base with a reinforced aluminum or nylon unit is the only responsible course of action.
Managing Upholstery Tears and Cushion Breakdown
Synthetic polyurethane leather commonly flakes or splits along the seat bolsters and front edge after extensive friction. While flaking leather does not compromise mechanical safety, it diminishes the aesthetic value of your setup. Applying self-adhesive leather repair patches or fitting a breathable stretch-fabric slipcover provides a practical barrier against further peeling.
Internal seat padding can compress and lose resilience over years of daily desk work. If the seat foam has bottomed out against the hard metal or wood subframe, supplemental support becomes necessary. High-density memory foam seat cushions can be placed directly on top of the original chair base to relieve pressure points along the thighs and hips. You can also unzip the bottom upholstery casing on some models to slide in replacement high-resilience foam inserts.
Inspect the elastic support webbing beneath the seat pan if the chair feels hollow or excessively sunken. Many racing-style gaming chairs utilize heavy elastic straps suspended across steel frame tubing to support the main cushion. If one of these straps snaps or slips off its mounting hook, the center of the seat will sag dramatically. Re-hooking detached strap clips or securing replacement elastic webbing restores foundational tension beneath the primary foam layer.
Safety Precautions and Post-Repair Verification
Working on heavy, spring-loaded, or pressurized chair hardware demands basic safety precautions. Never attempt to puncture, heat, cut, or disassemble a pressurized gas cylinder casing, as internal gas under high pressure can cause serious injury. Always relieve tilt spring tension before unbolting control plates, and support the seat backrest when servicing recline hinges.
After completing any hardware repair or component swap, conduct a systematic safety check before resuming normal use. Place the chair on a level floor and push down firmly on the seat to ensure the tapered cylinder joints have engaged securely. Test the pneumatic height lever across its full stroke range to confirm smooth lifting and locking action. Finally, recline the backrest through several angles while listening for abnormal clicking or grinding noises.
Routine maintenance prevents future breakdowns and keeps your gaming chair functioning reliably for years. Check mounting bolts on the armrests and baseplate every few months, retightening any fasteners that have loosened from vibration. By addressing hardware wear promptly with suitable replacement parts, you can enjoy a stable, supportive chair without the expense of buying new furniture.





Write Your Review
No reviews yet. Be the first to share your experience!